Course Content
Adding Resources
In this lesson you will cover how users, assets and crews can be added to the Teamleaf Scheduler, including how you can filter which assets and users you add to ensure your selected crews are most relevant to you.
Follow along using the video below, or for more detailed information about the scheduler setup, follow the guide below
Setup your Scheduler
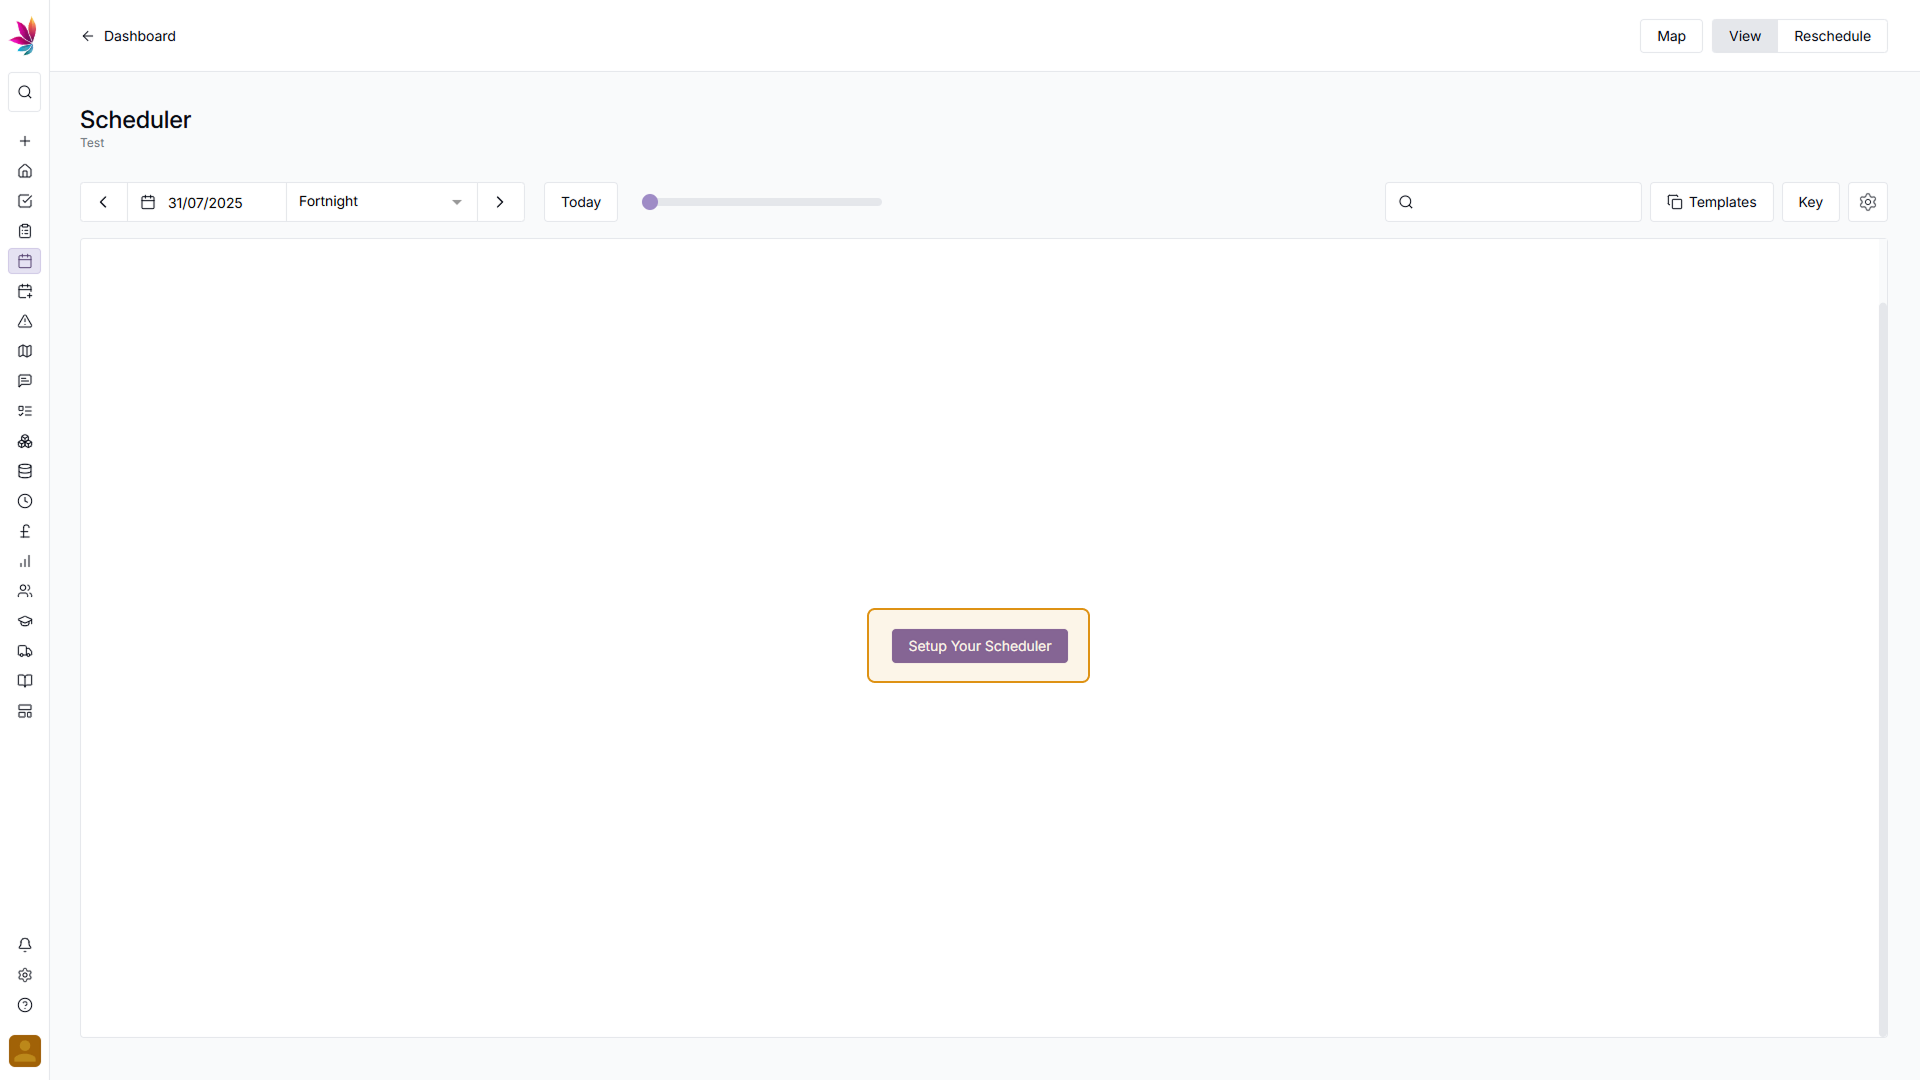
By default, no users or assets will be selected if you haven’t set up your Scheduler yet, so no crews will be visible. Click the ‘Setup your scheduler’ button in the centre of the screen
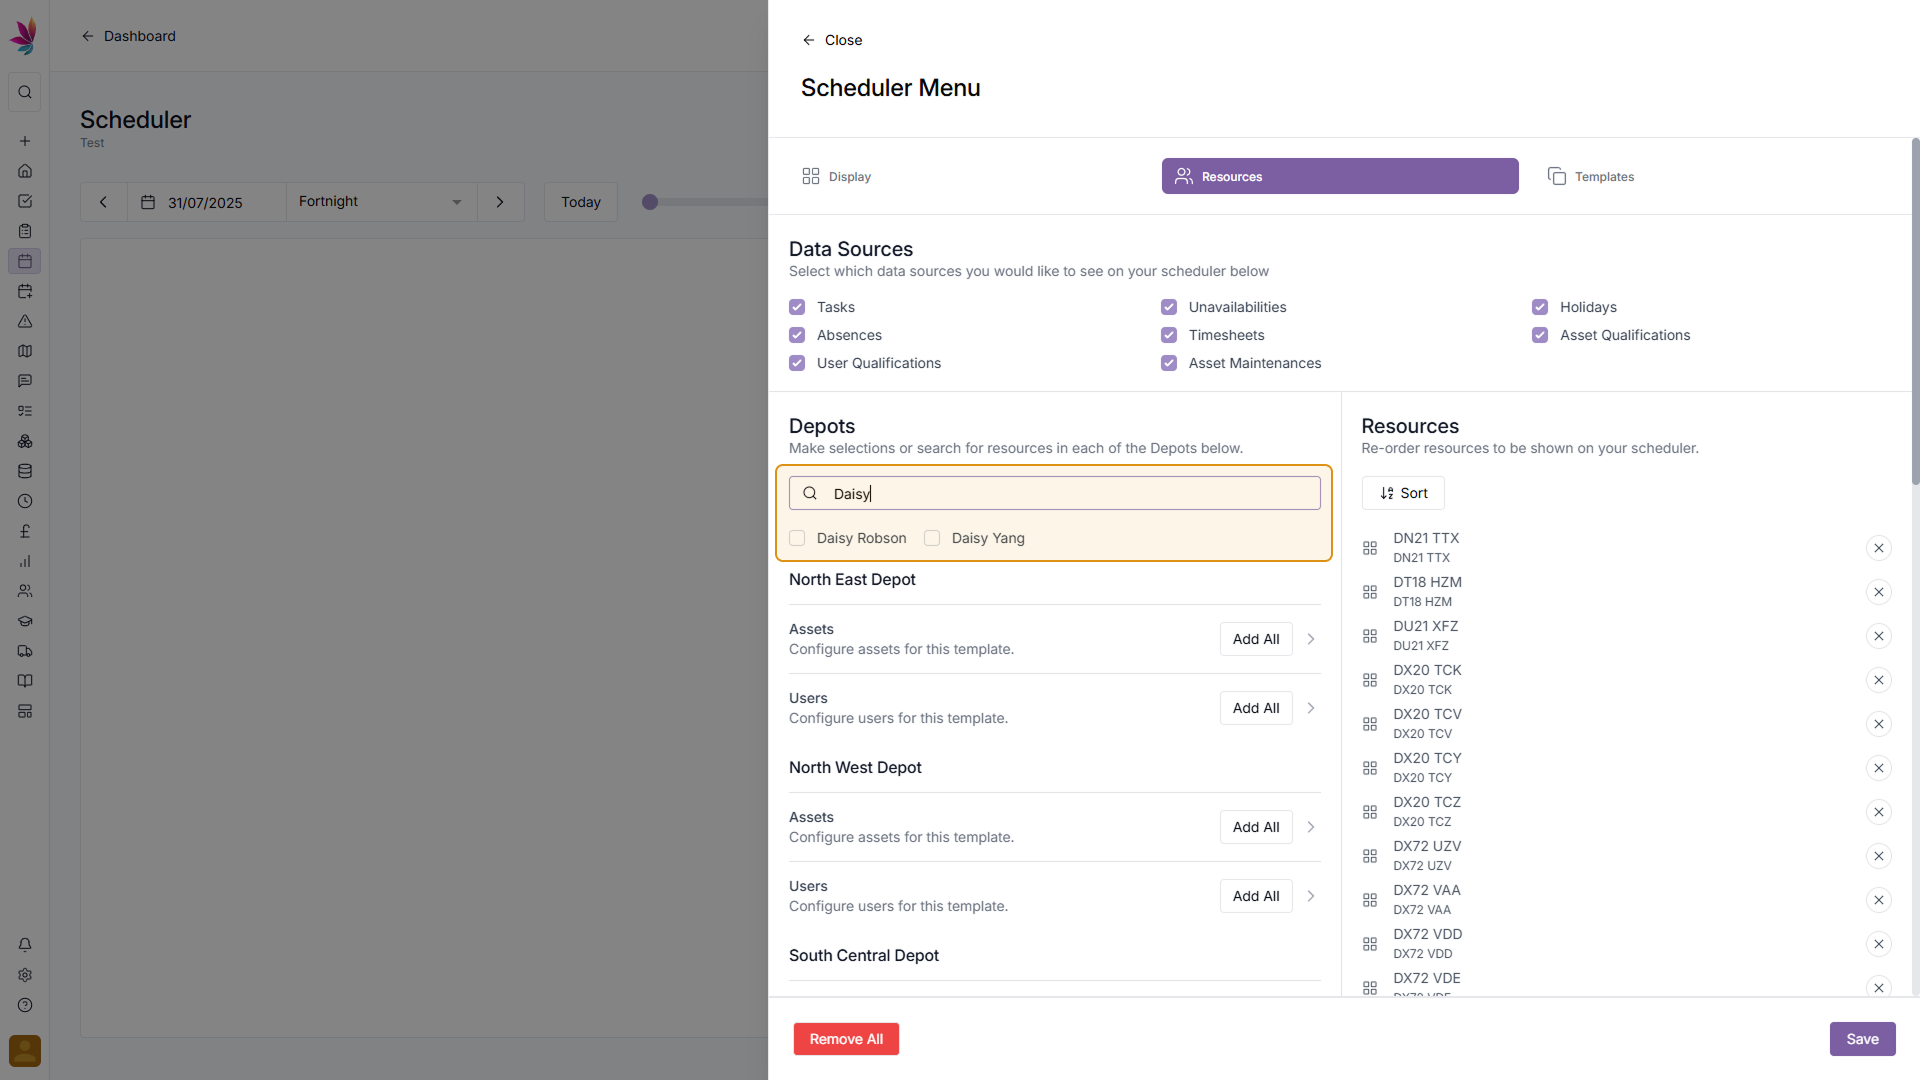
Scheduler Menu Tabs
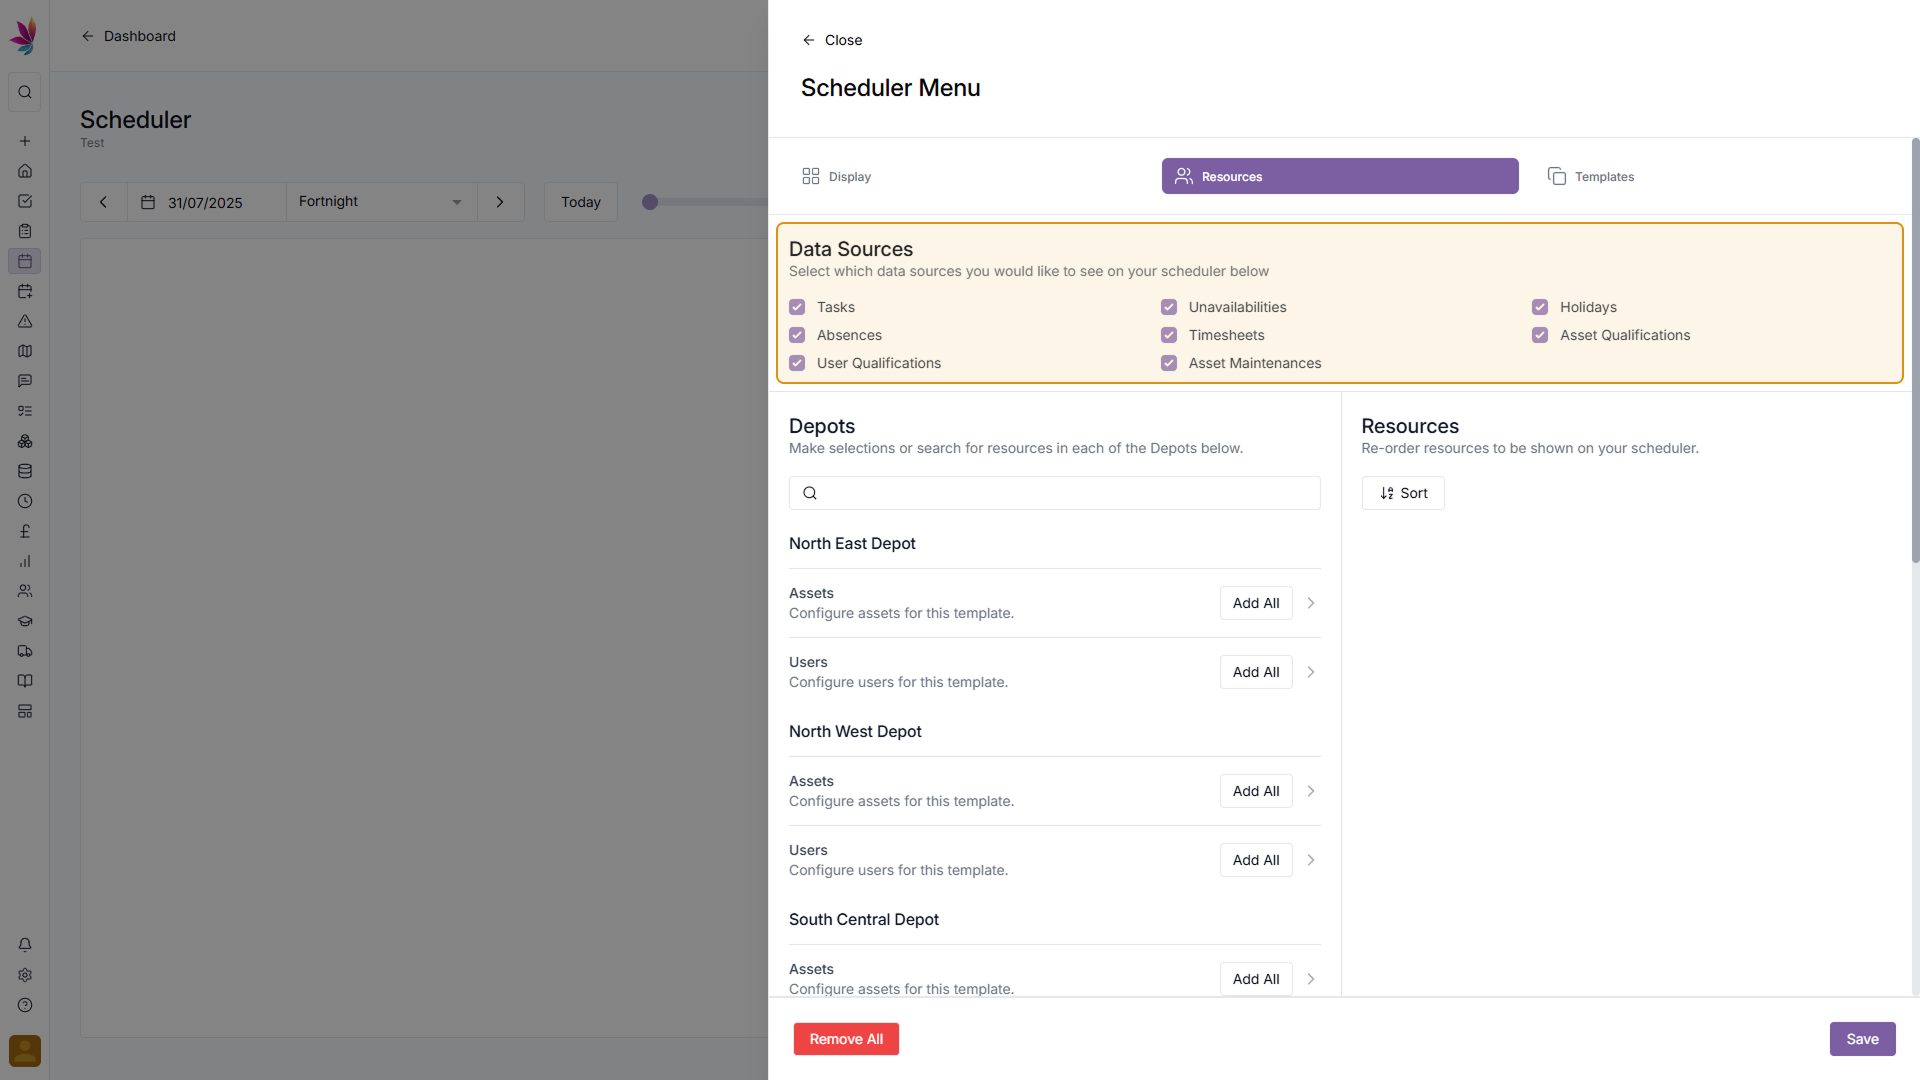
Once you’ve clicked this, a menu will appear on the right side of the screen, which will give you many options. There are three tabs across the top of the menu, ‘Display’, ‘Resources’, and ‘Templates’. By default, Resources will be selected, but the other menus can be used to further customise the scheduler. For now, we will focus on the Resources tab.
Select Data Sources
Before you add users and assets, use the ‘Data Sources’ section to select which data sources you would like to see on the Scheduler, by default all of them will be selected, so click to deselect any which you don’t want.
Add Resources
Once you’ve selected your Data Sources, use the ‘Depots’ section to add your users and assets. Users and assets are sorted by depot here, so for each depot you can either use the ‘Add All’ buttons to add all users or assets for a depot, or click the dropdown menu to select individual users and assets from each depot
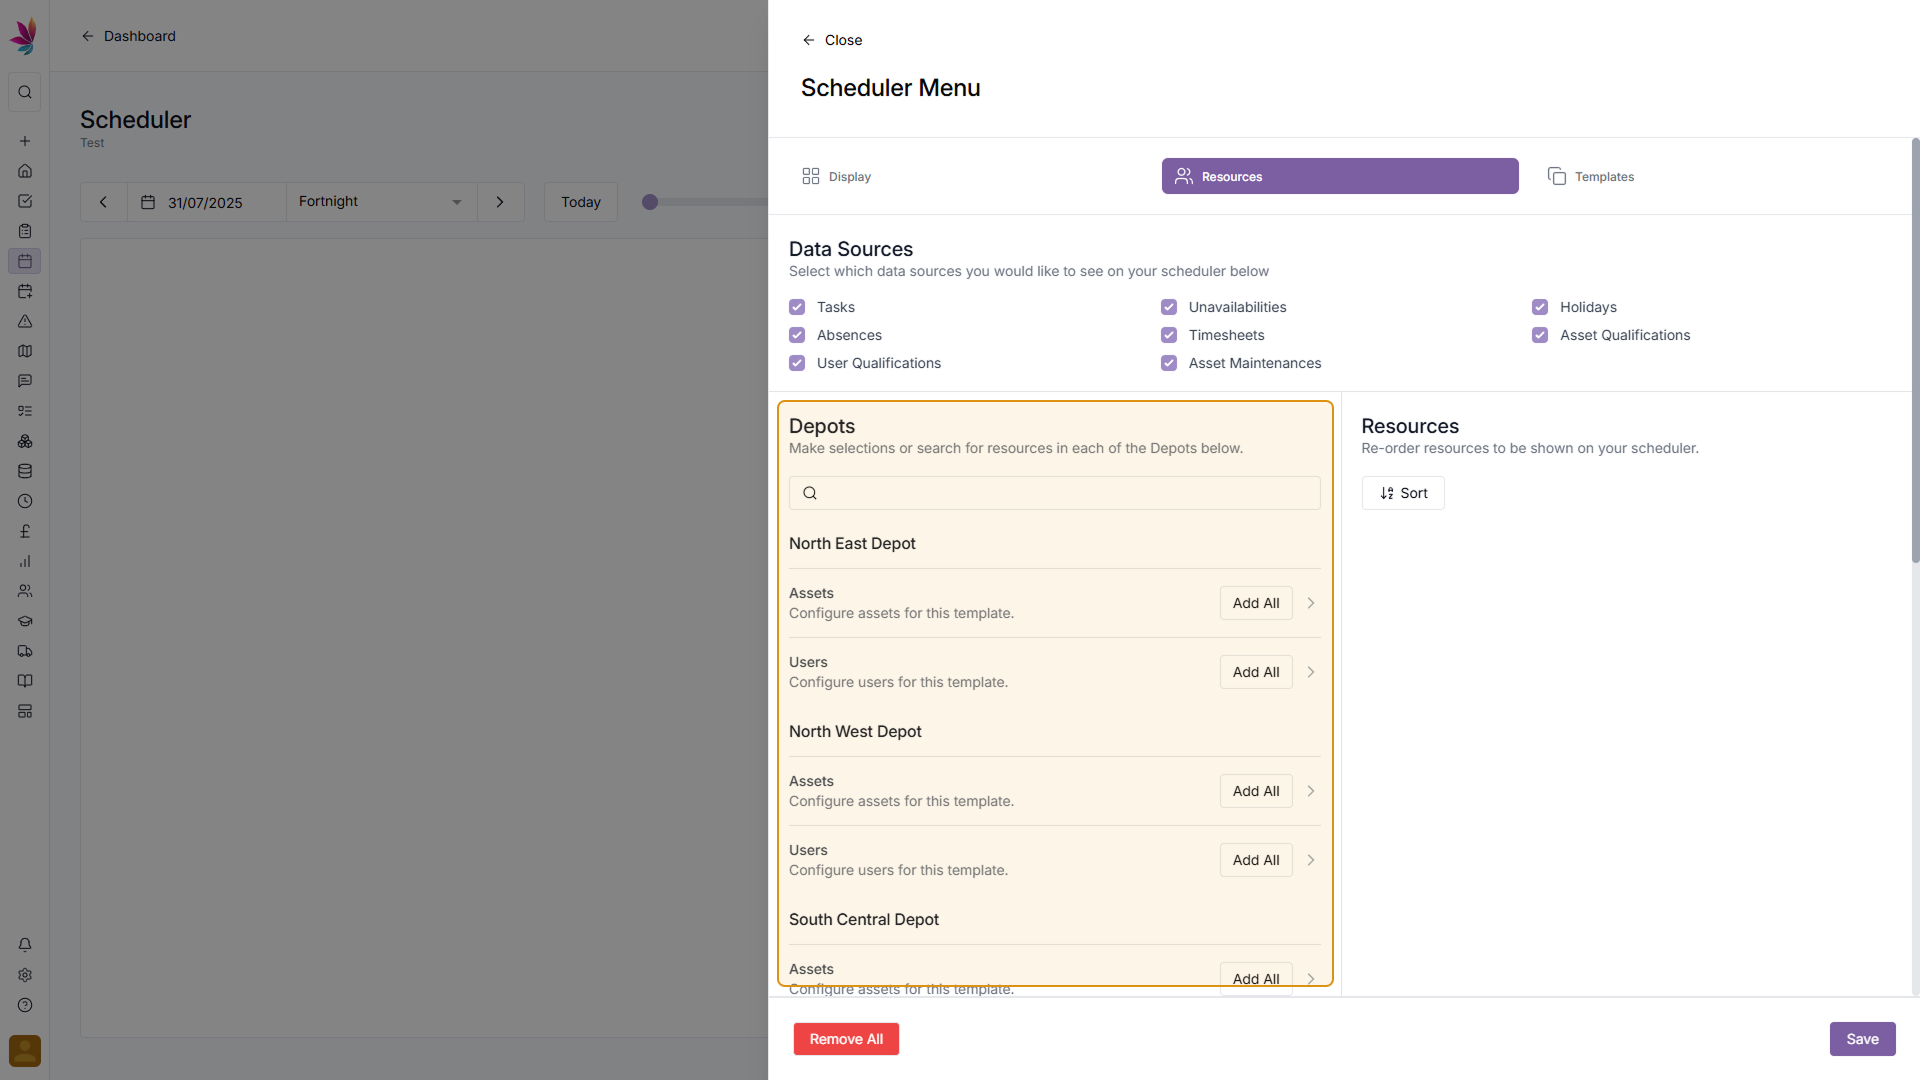

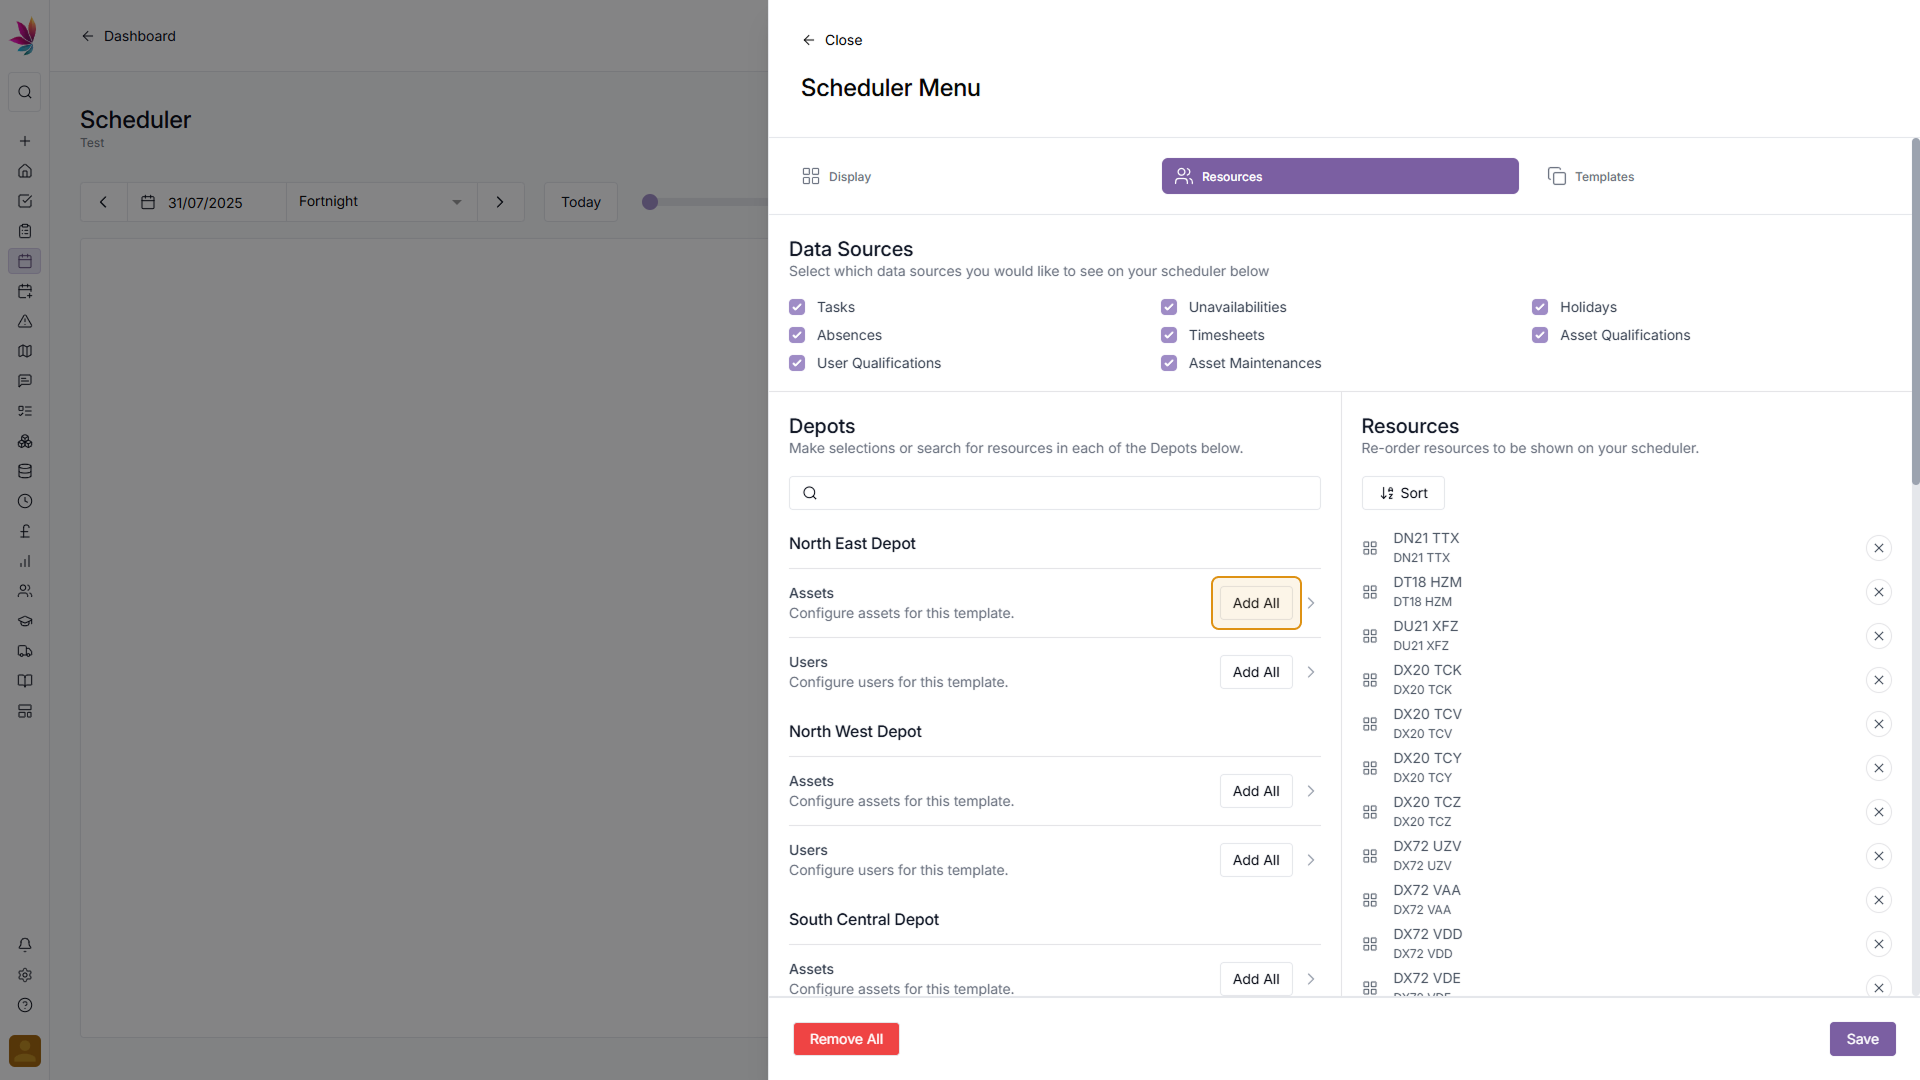
You can also search for individual users or assets using the search bar at the top of the depots section. This is particularly helpful if you need to find a certain user or asset but don’t know which depot they are assigned to. Users and assets can be removed from your selection at any time by either removing them individually using the X button on the right hand side, or by using the ‘Remove All’ button in the bottom left of the menu.
Save selected Users and Assets
Once you’re happy with the users and assets you’ve selected to see on the scheduler, click the ‘Save’ button in the bottom right

You will then be taken back to the Scheduler, where all of the users and assets you’ve just selected will be visible.