Course Content
Configuring Display settings
The Teamleaf scheduler features a number of display settings, so you can set up the scheduler in a way that suits you and your workflow
Follow along using the video below, or for more detailed information about scheduler customisation, follow the guide below:
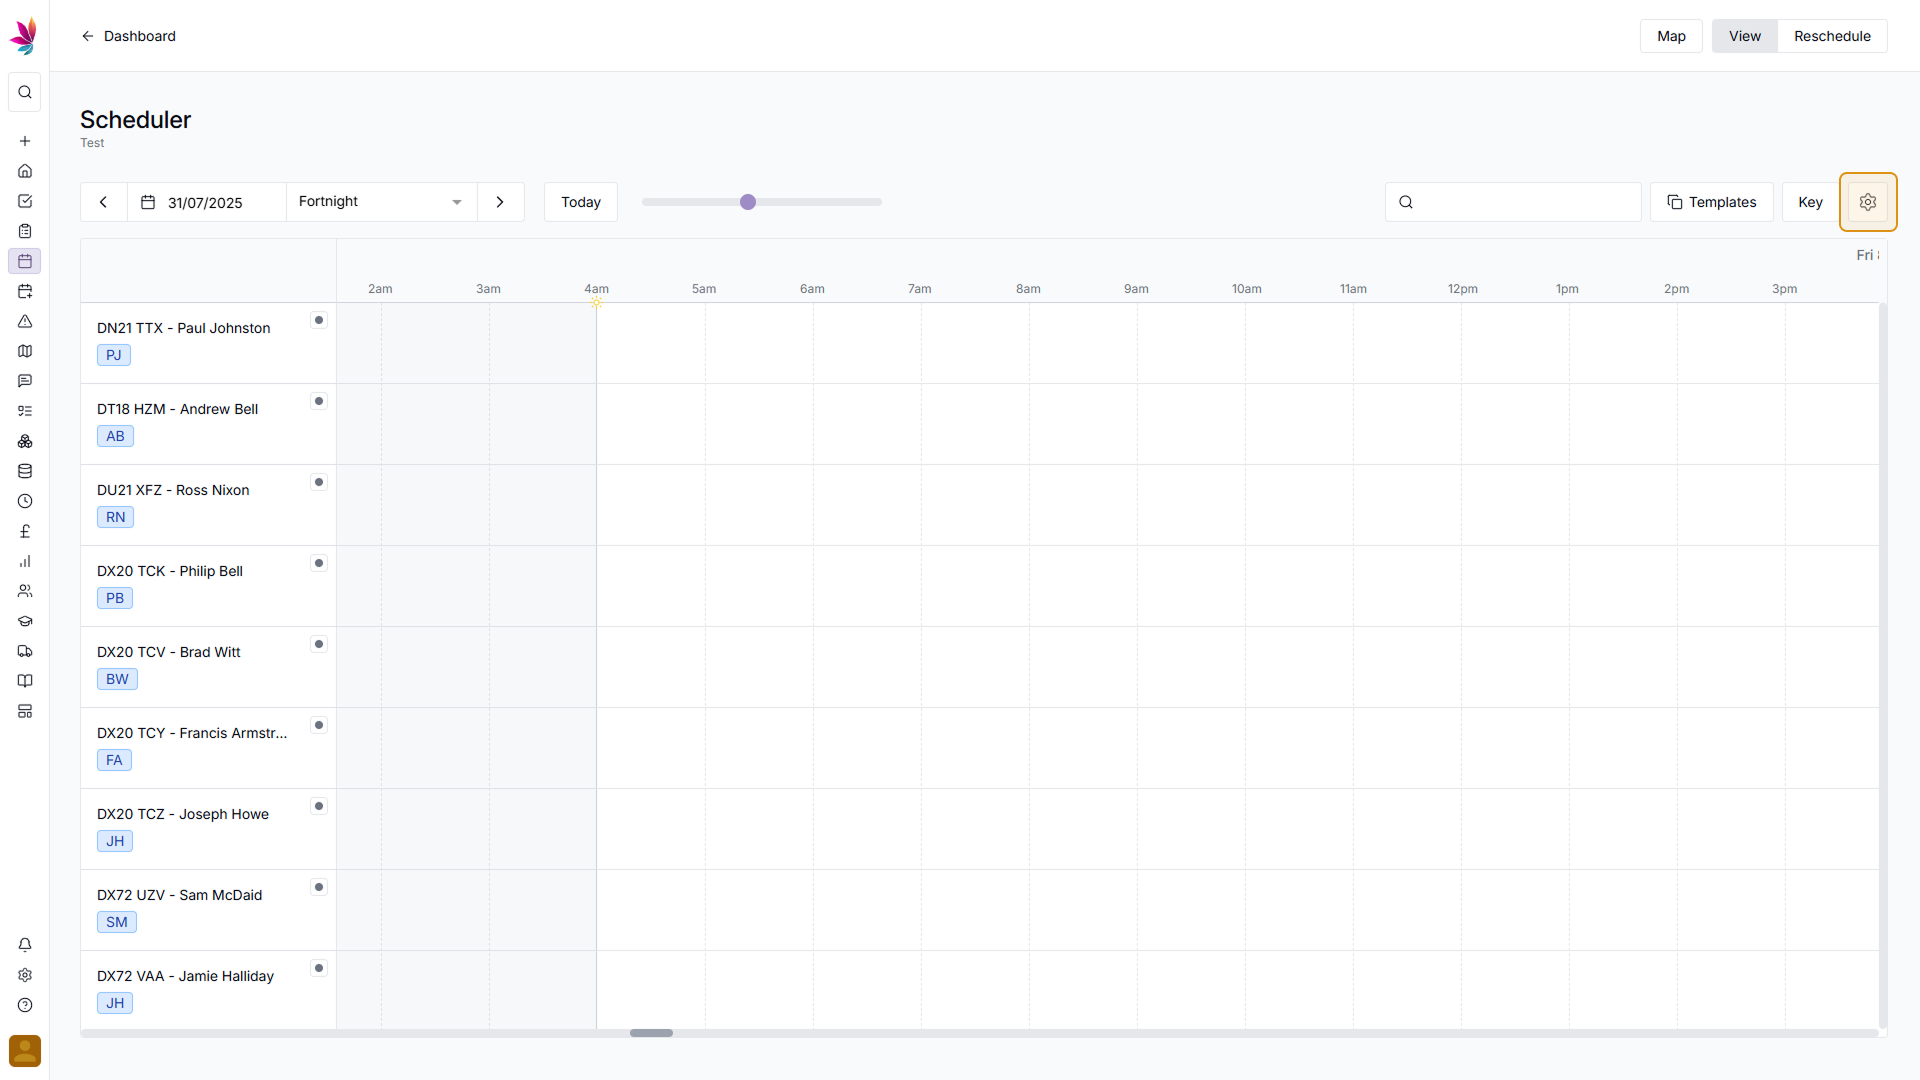
Go to Scheduler Settings
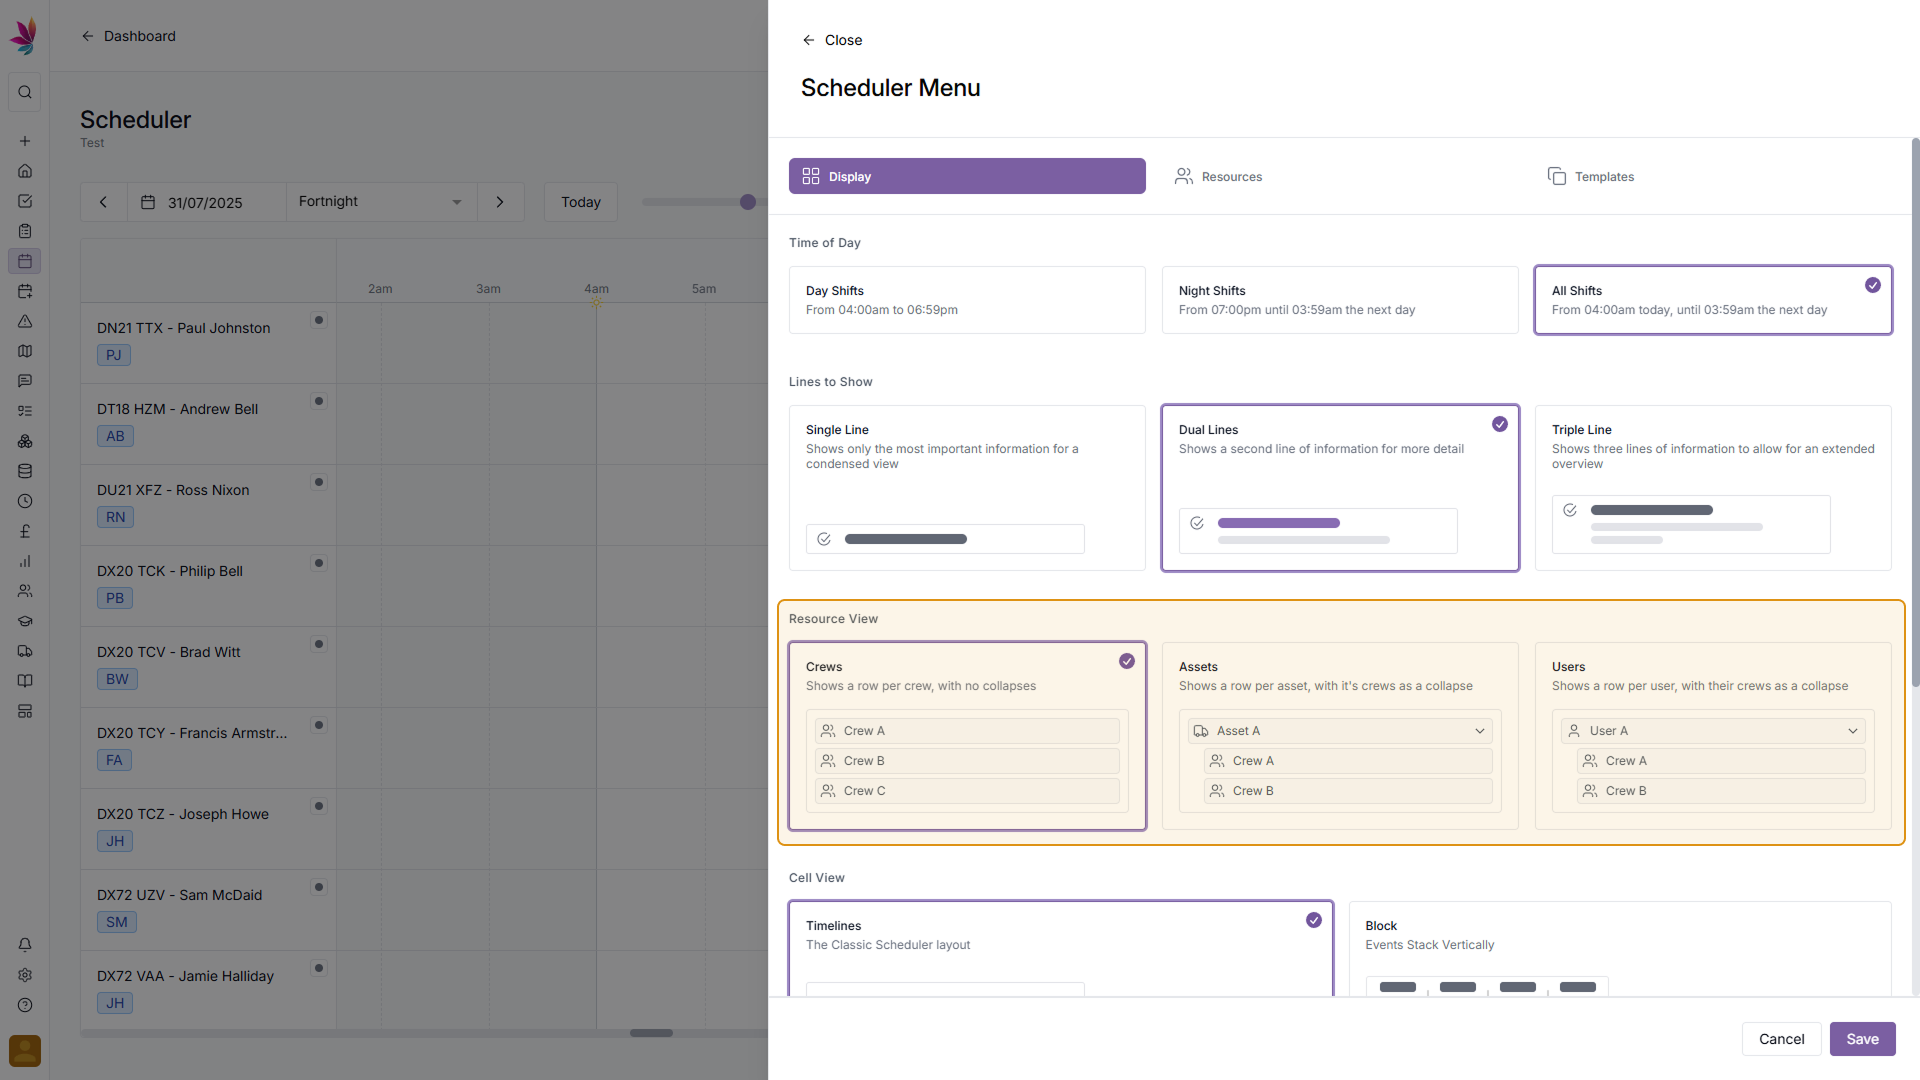
To begin customising your Scheduler view, click the Settings icon in the top right corner of the screen, just above the Scheduler. Once you’re here, select the ‘Display’ tab (if it is not already selected)
Select Display Options
From here, you will have a number of options to choose from, which will let you customise your Scheduler. Firstly, select which time of day you would like to show shifts for. Day Shifts only will show shifts from 4:00am to 6:59pm, Night Shifts only will show shifts from 7:00pm to 3:59am, and All Shifts will show shifts for the entire day.
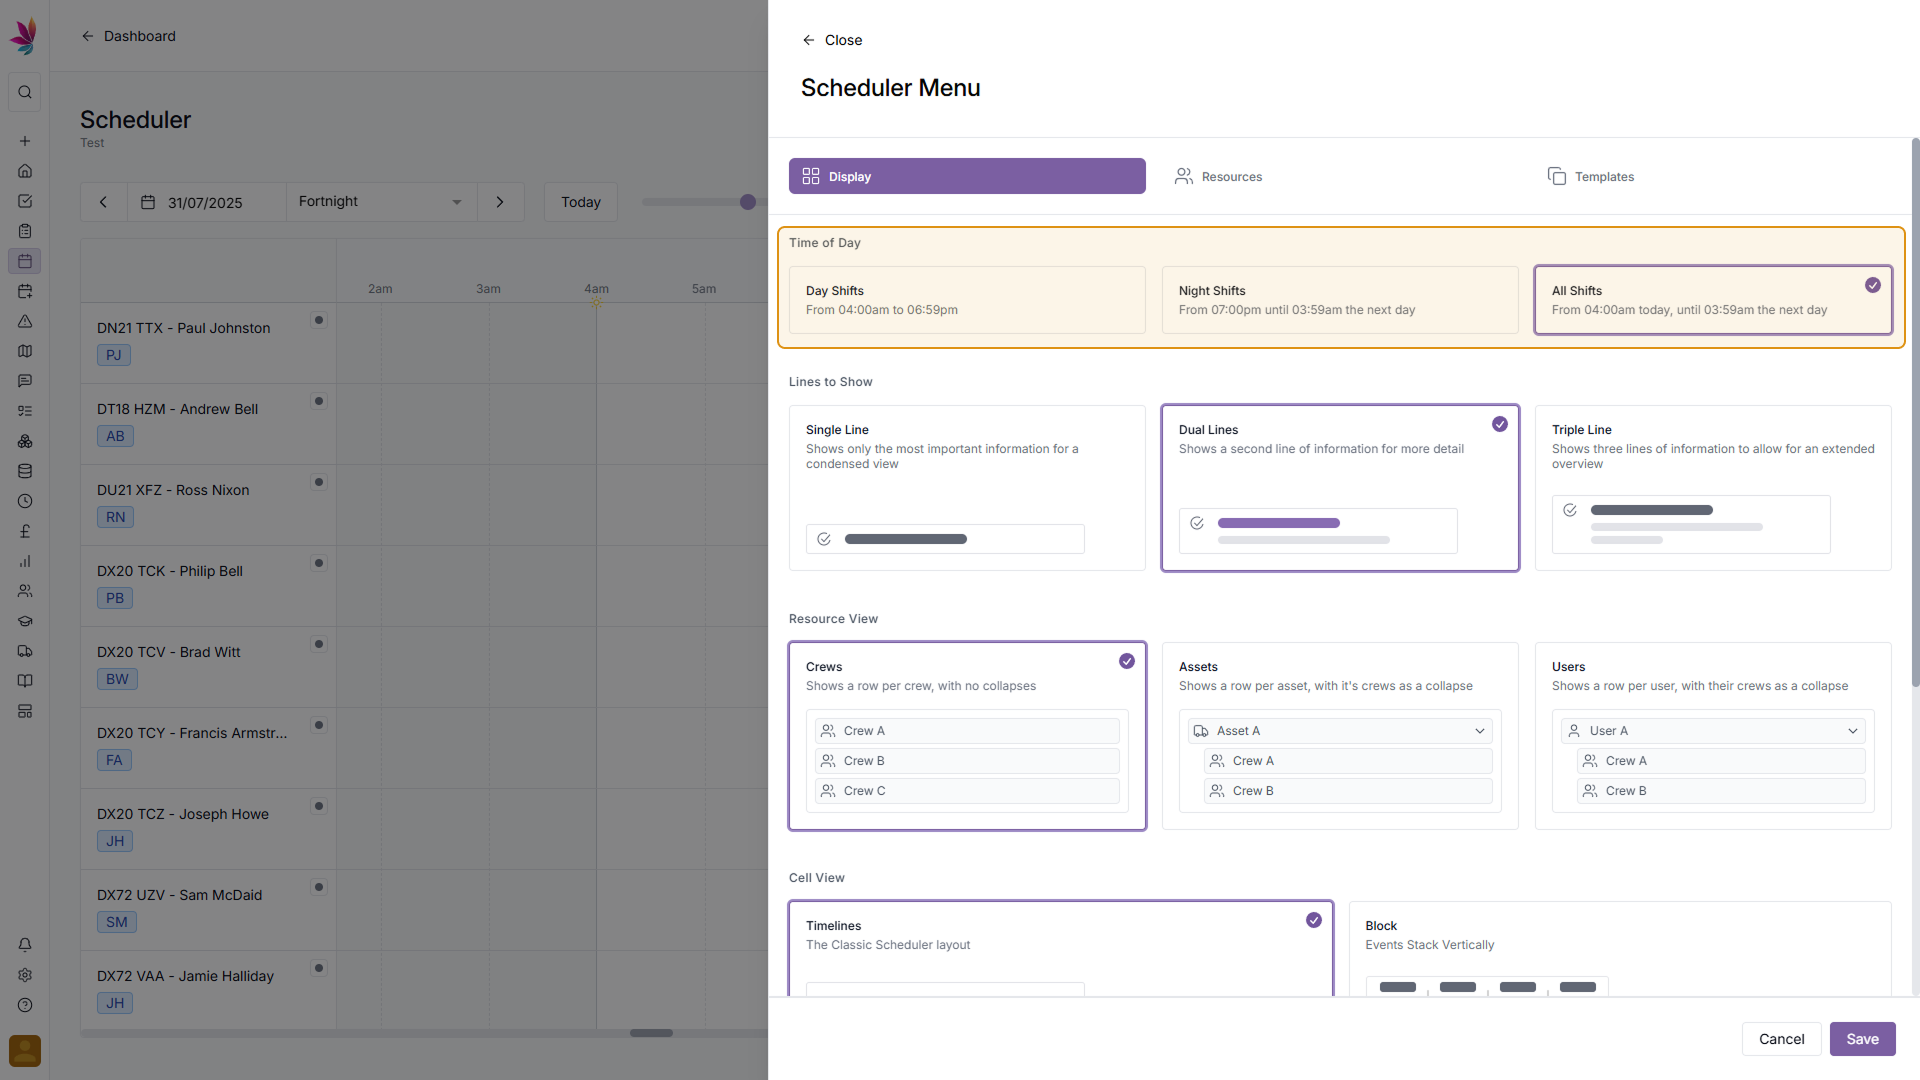
Next select your preferred ‘Lines to Show’ option. Single line will give you the most condensed view of the scheduler, so you can fit more crews on screen (without having to scroll), but will mean you can see less information at a glance. Dual lines will give you a little more information, but will mean a few less crews can be seen on screen. Finally, Triple lines will give you the most information at a glance, but will mean less crews can be seen on screen at once.
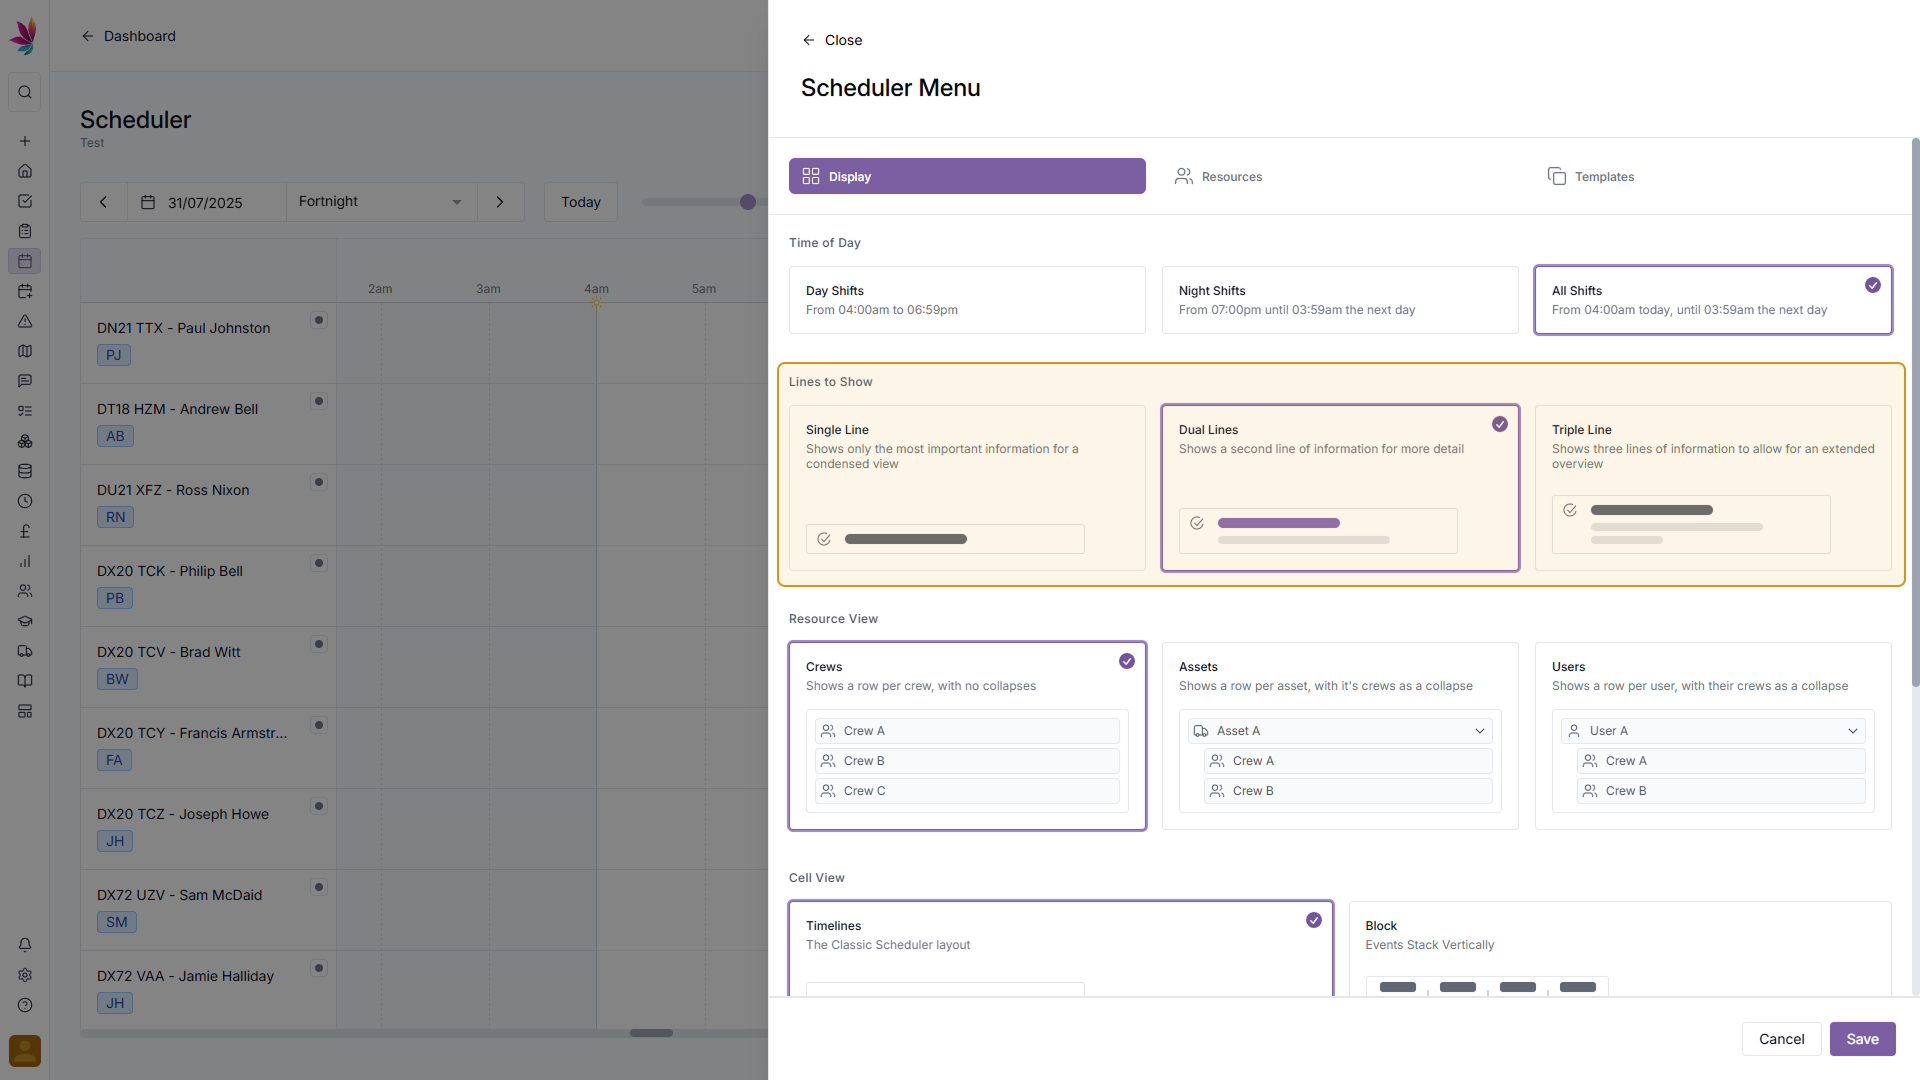
Next select your ‘Resource View’ preference. Crews view will show each crew individually, so individual users and assets may show up several times in different crews. Assets view will show each Asset, with a dropdown next to each asset to show each crew it is in. Users view will show each User, with a dropdown next to each user to show each crew they are in.
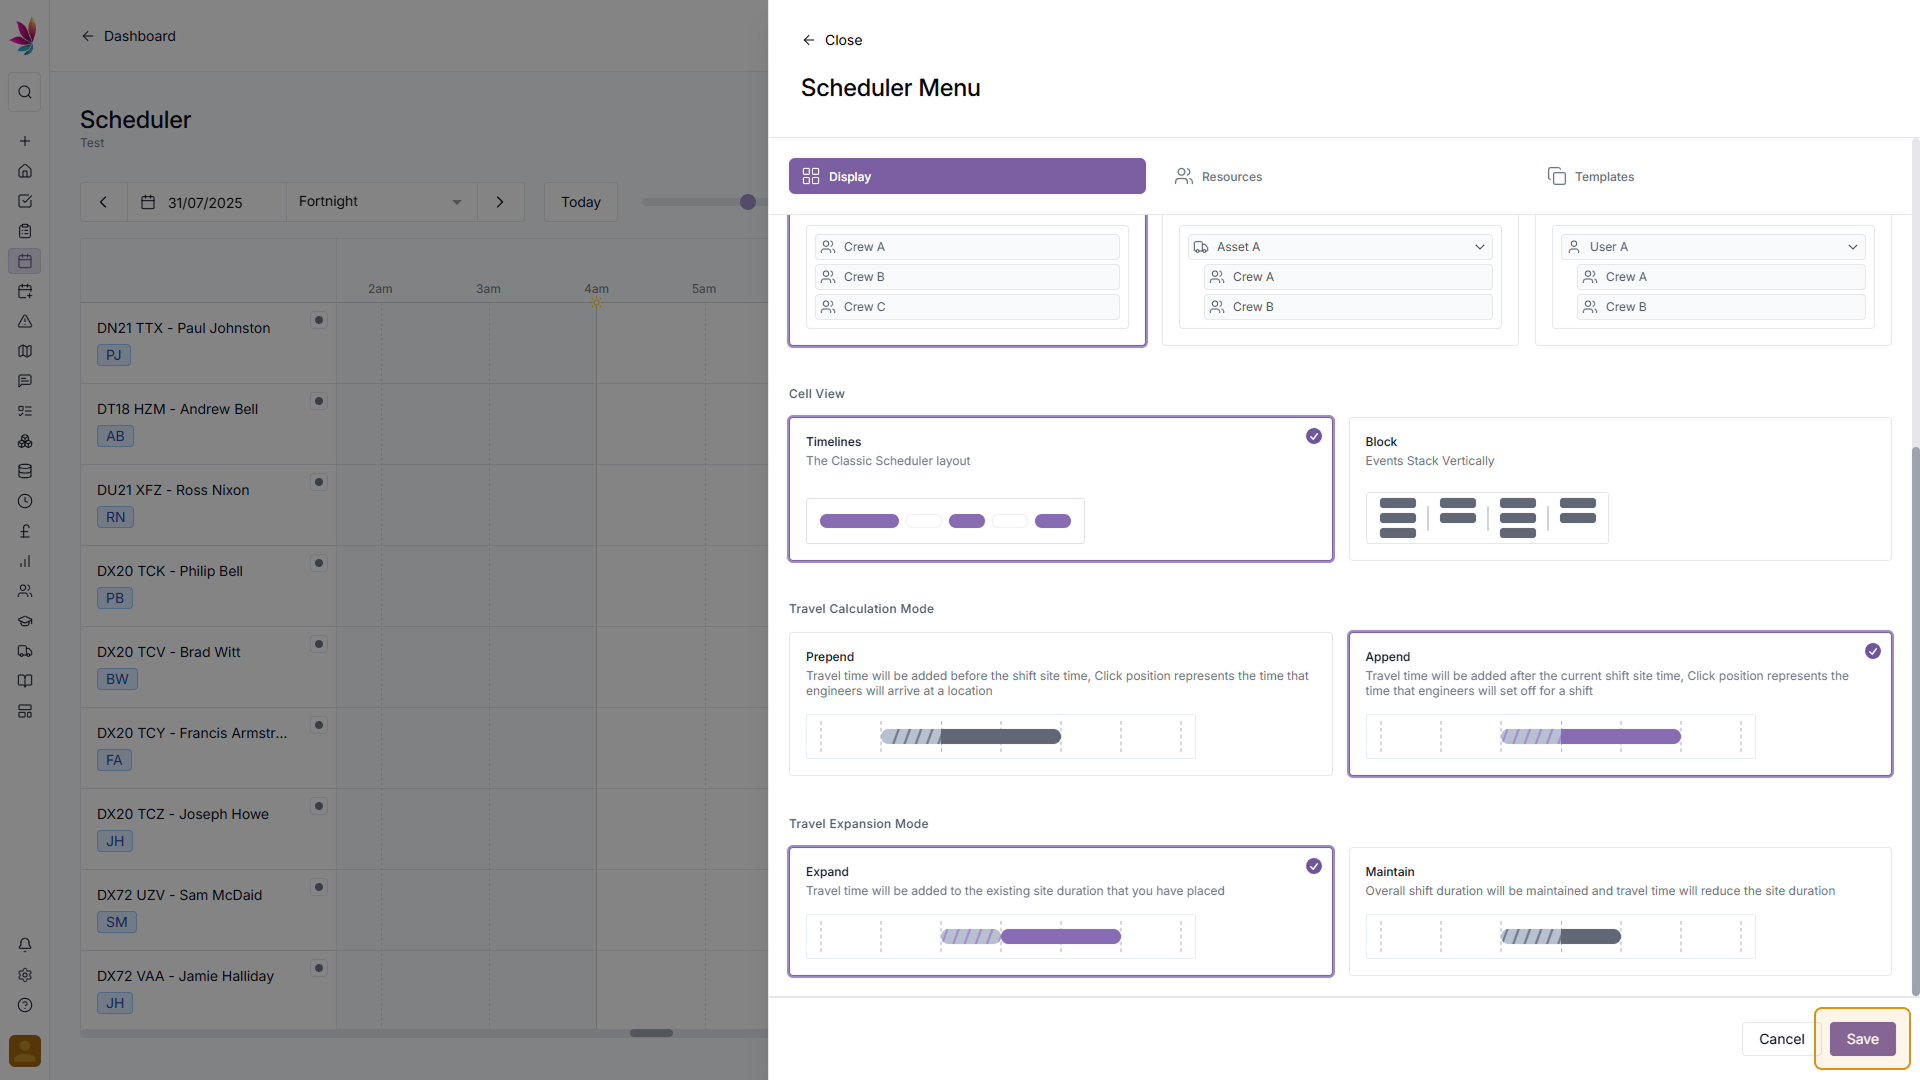
Next select your ‘Cell View’ preference. Timelines is the classic scheduler layout, and will show each shift laid out horizontally, with the length of each shift box proportional to the time it will take to complete. Block view stacks shifts vertically, showing more detail at once, but not representing the length of the shift visually (aside from the written start and end times)
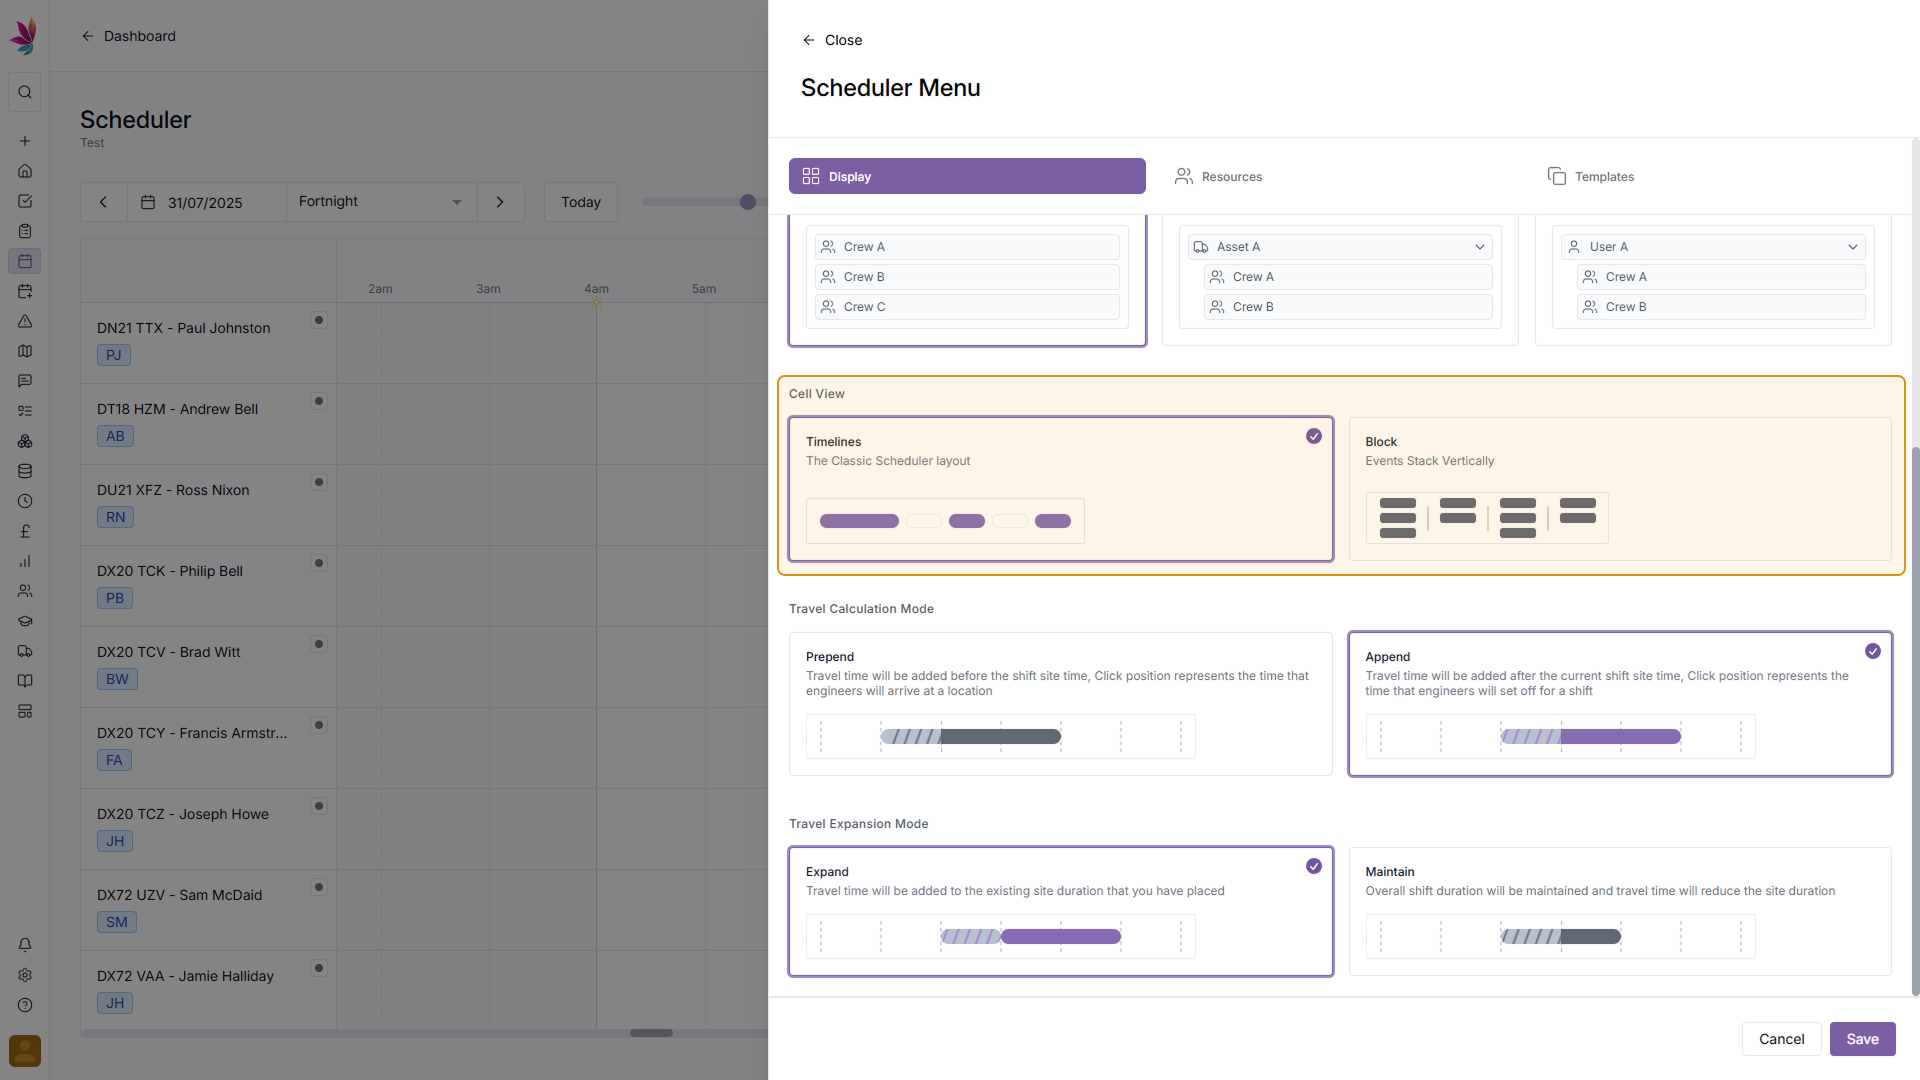
Next select ‘Travel Calculation Mode’. Prepend will mean that travel time is added on before the shift site time, meaning the click position on the scheduler is the time that engineers will arrive on site. Append will mean that travel time is added after the shift site time, meaning the click position on the scheduler is the time that engineers will set off to site.
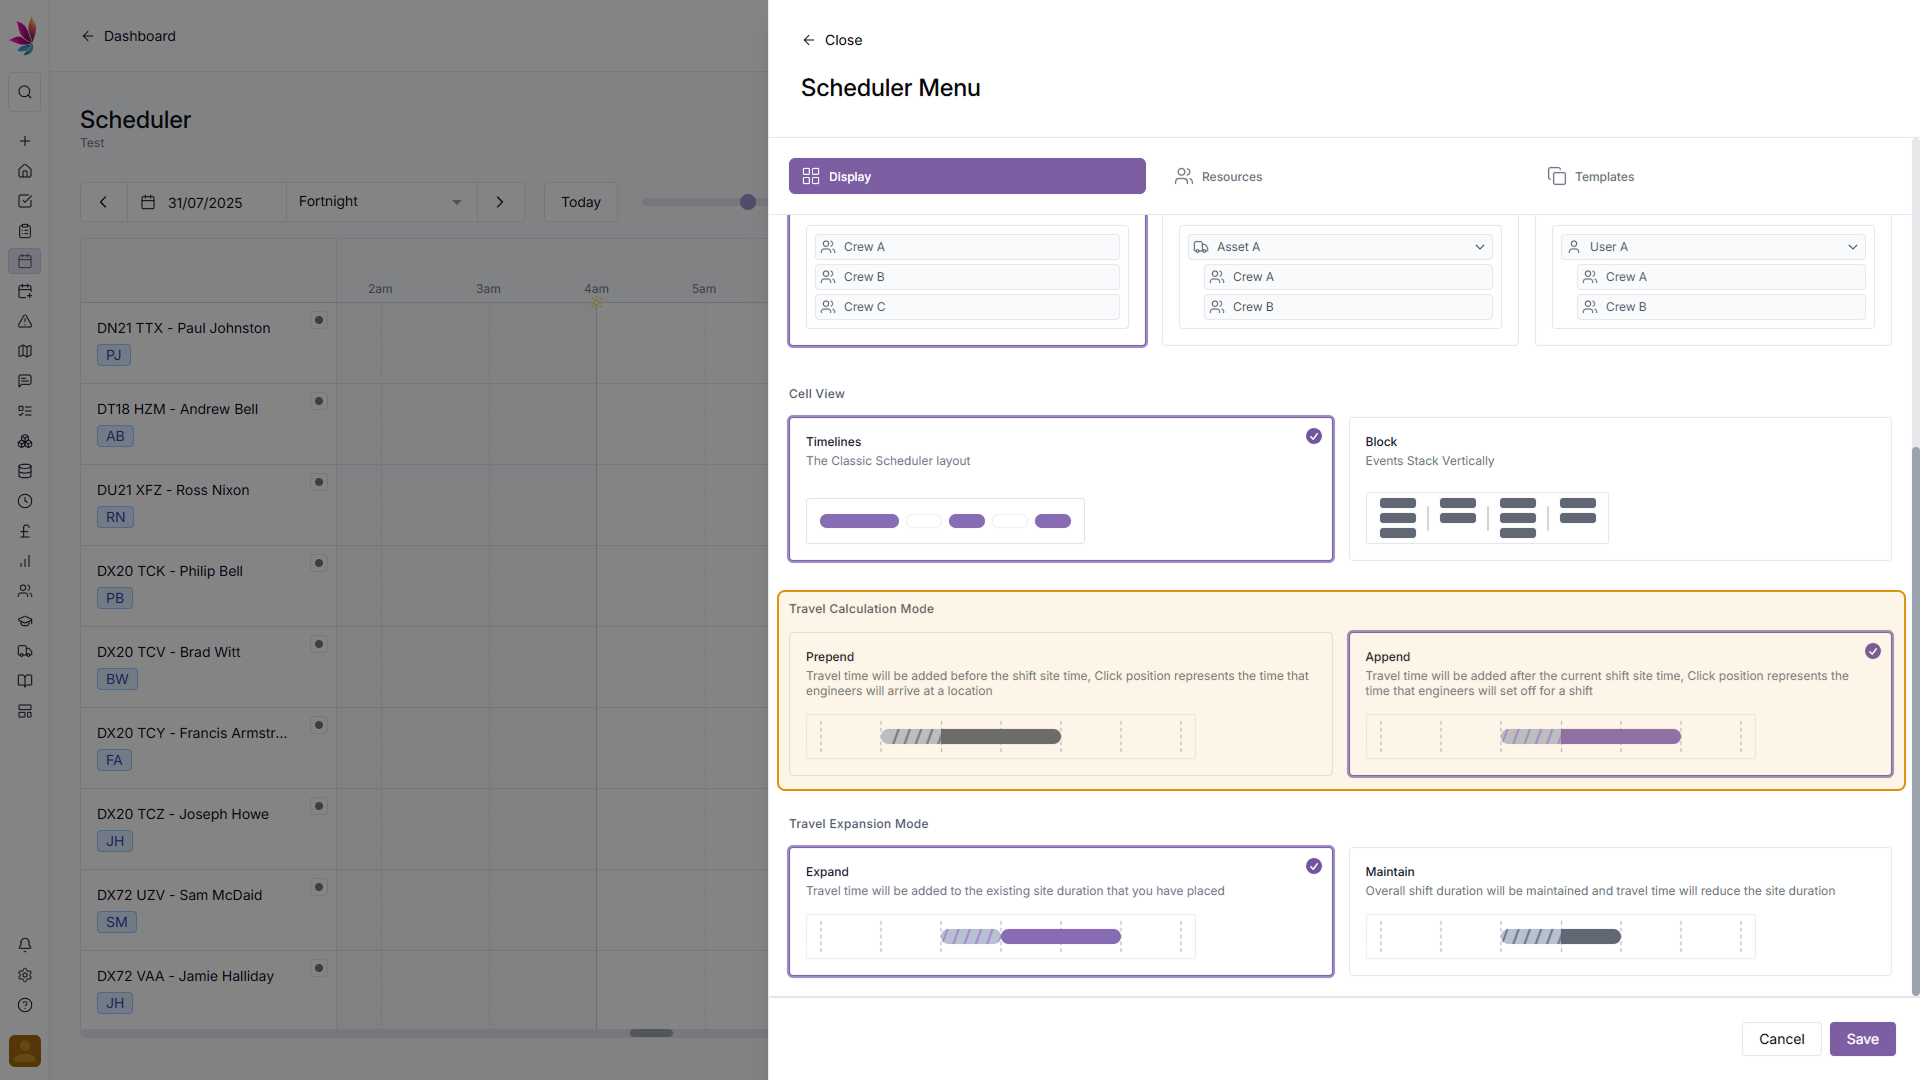
Finally, select ‘Travel Expansion Mode’. Expand will mean that travel time is added to the existing site duration that you have placed, whereas Maintain will mean overall shift duration is maintained, and travel time will reduce the site duration.
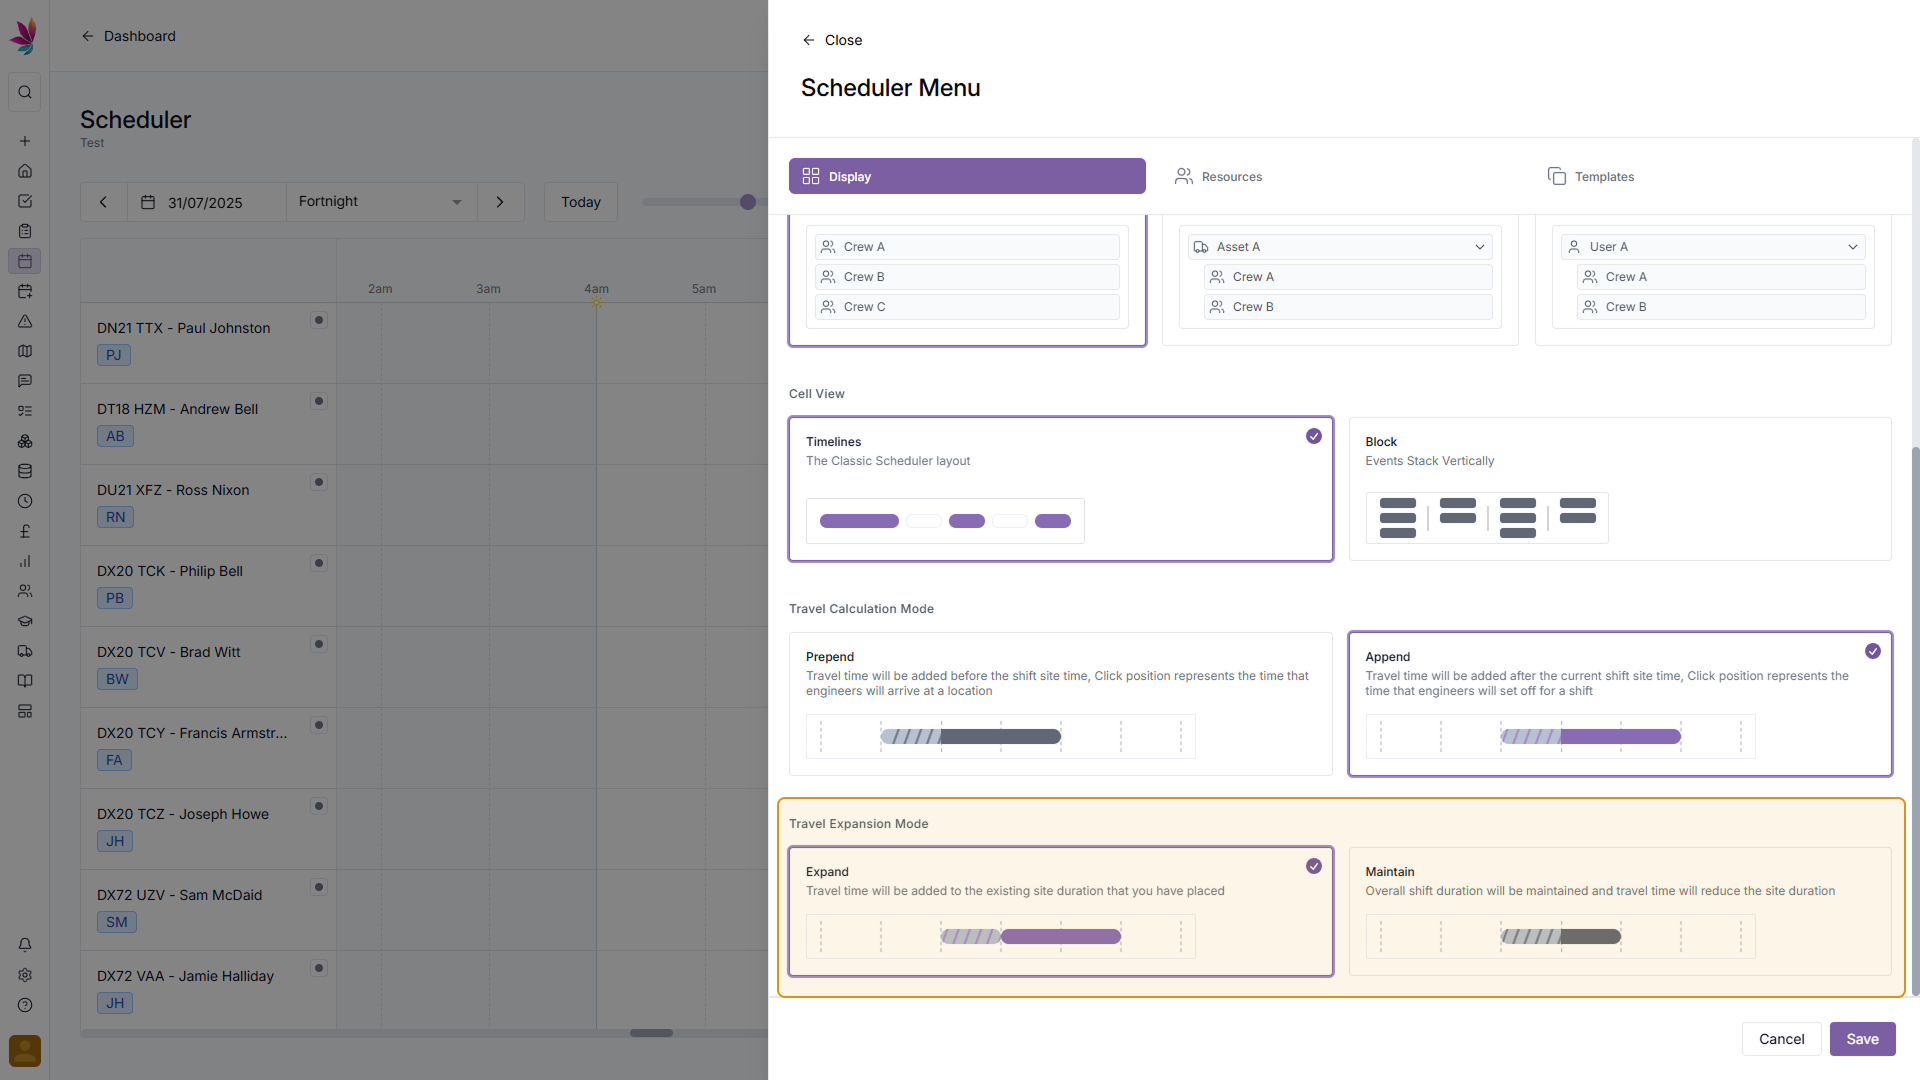
Save Display Settings
Once you’re happy with the options you’ve selected, click the ‘Save’ button in the bottom right to apply them, or click ‘Cancel’ to discard your changes and return to the Scheduler without affecting the look