Using the Scheduler
In this tutorial you will learn how to reschedule shifts, assign shifts to new crews, use Teamleaf Ai, and organise your scheduler with row colours
Step-by-Step Guide
Scheduler
Shifts
Step 1
View and Reschedule Mode
When you first open the scheduler, you will be in view mode, so extra details about shifts can be accessed easily. This can be toggled in the top right corner

Step 2
View shift options
While in view mode, clicking on a shift will give you a variety of options

Step 3
View Day Option
Clicking the View day option will open all the details about the shift, so you can get more information on that shift, shifts scheduled on the same day, and the travel for that day. Clicking the close arrow at the top of the screen will take you back to the scheduler


Step 4
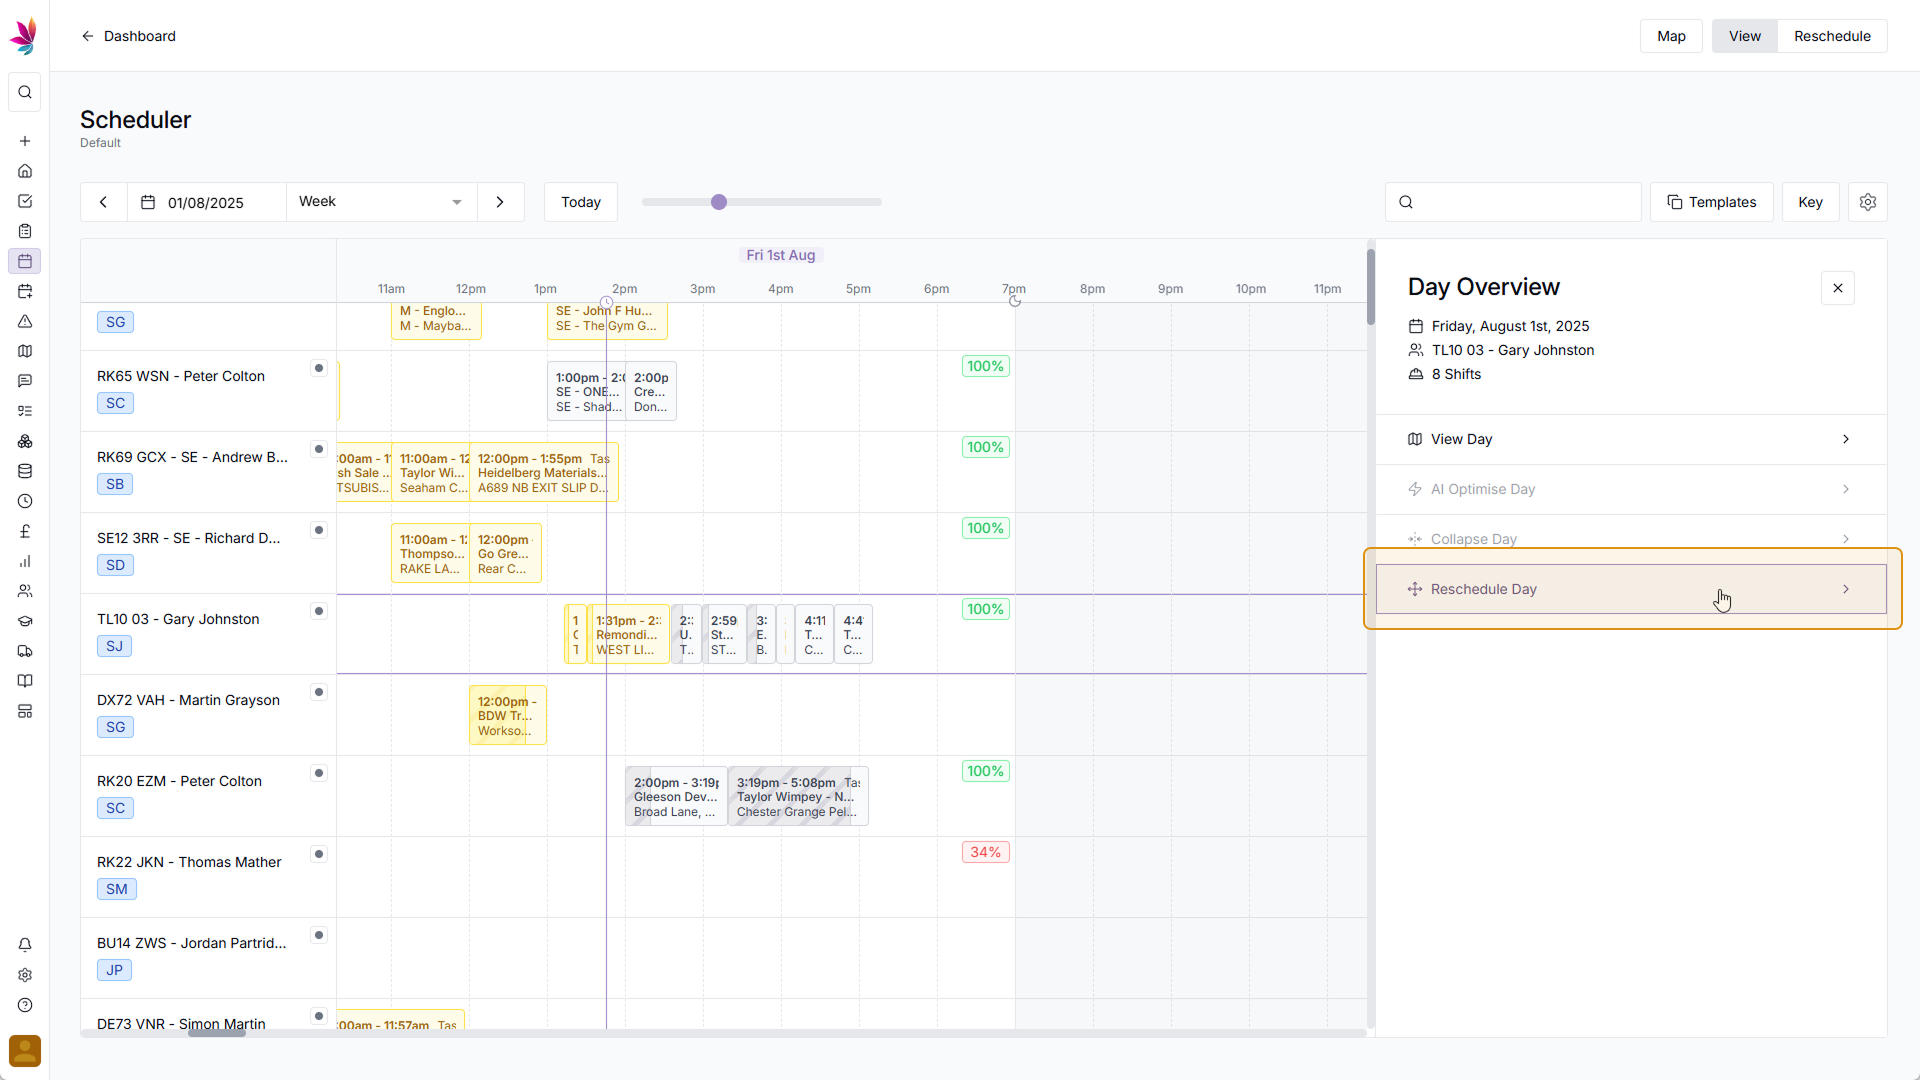
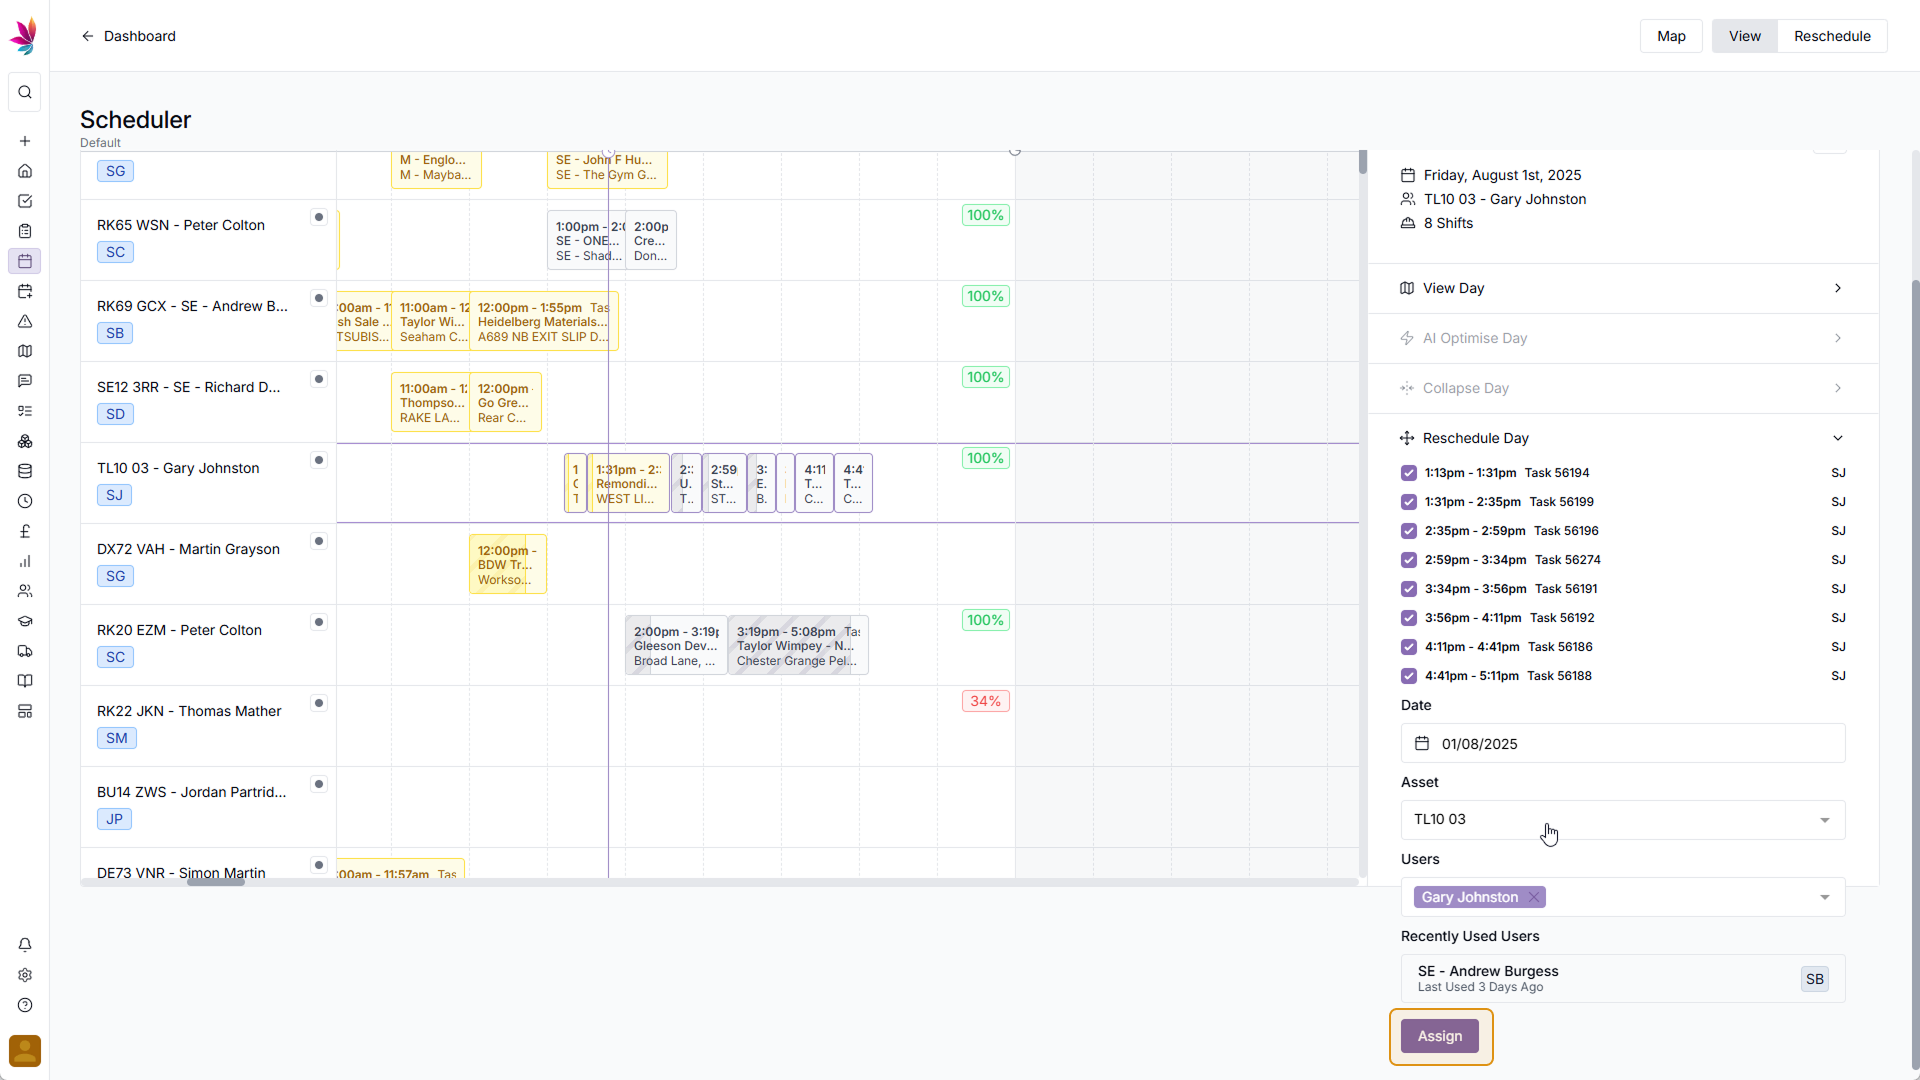
Reschedule day option
If you need to reschedule all the shifts on a day for any reason, click the 'Reschedule day' option. This will allow you to move all the shifts to a date, users, and assets of your choice. Once you're happy with your choices, click 'Save' in the bottom right corner of the screen
Step 5
Set Row Colours
If you wish, you can give rows different colours, so you can better organise your scheduler. To do this, simply click the small grey dot beside a crew, and select your preferred colour from the dropdown menu


Step 6
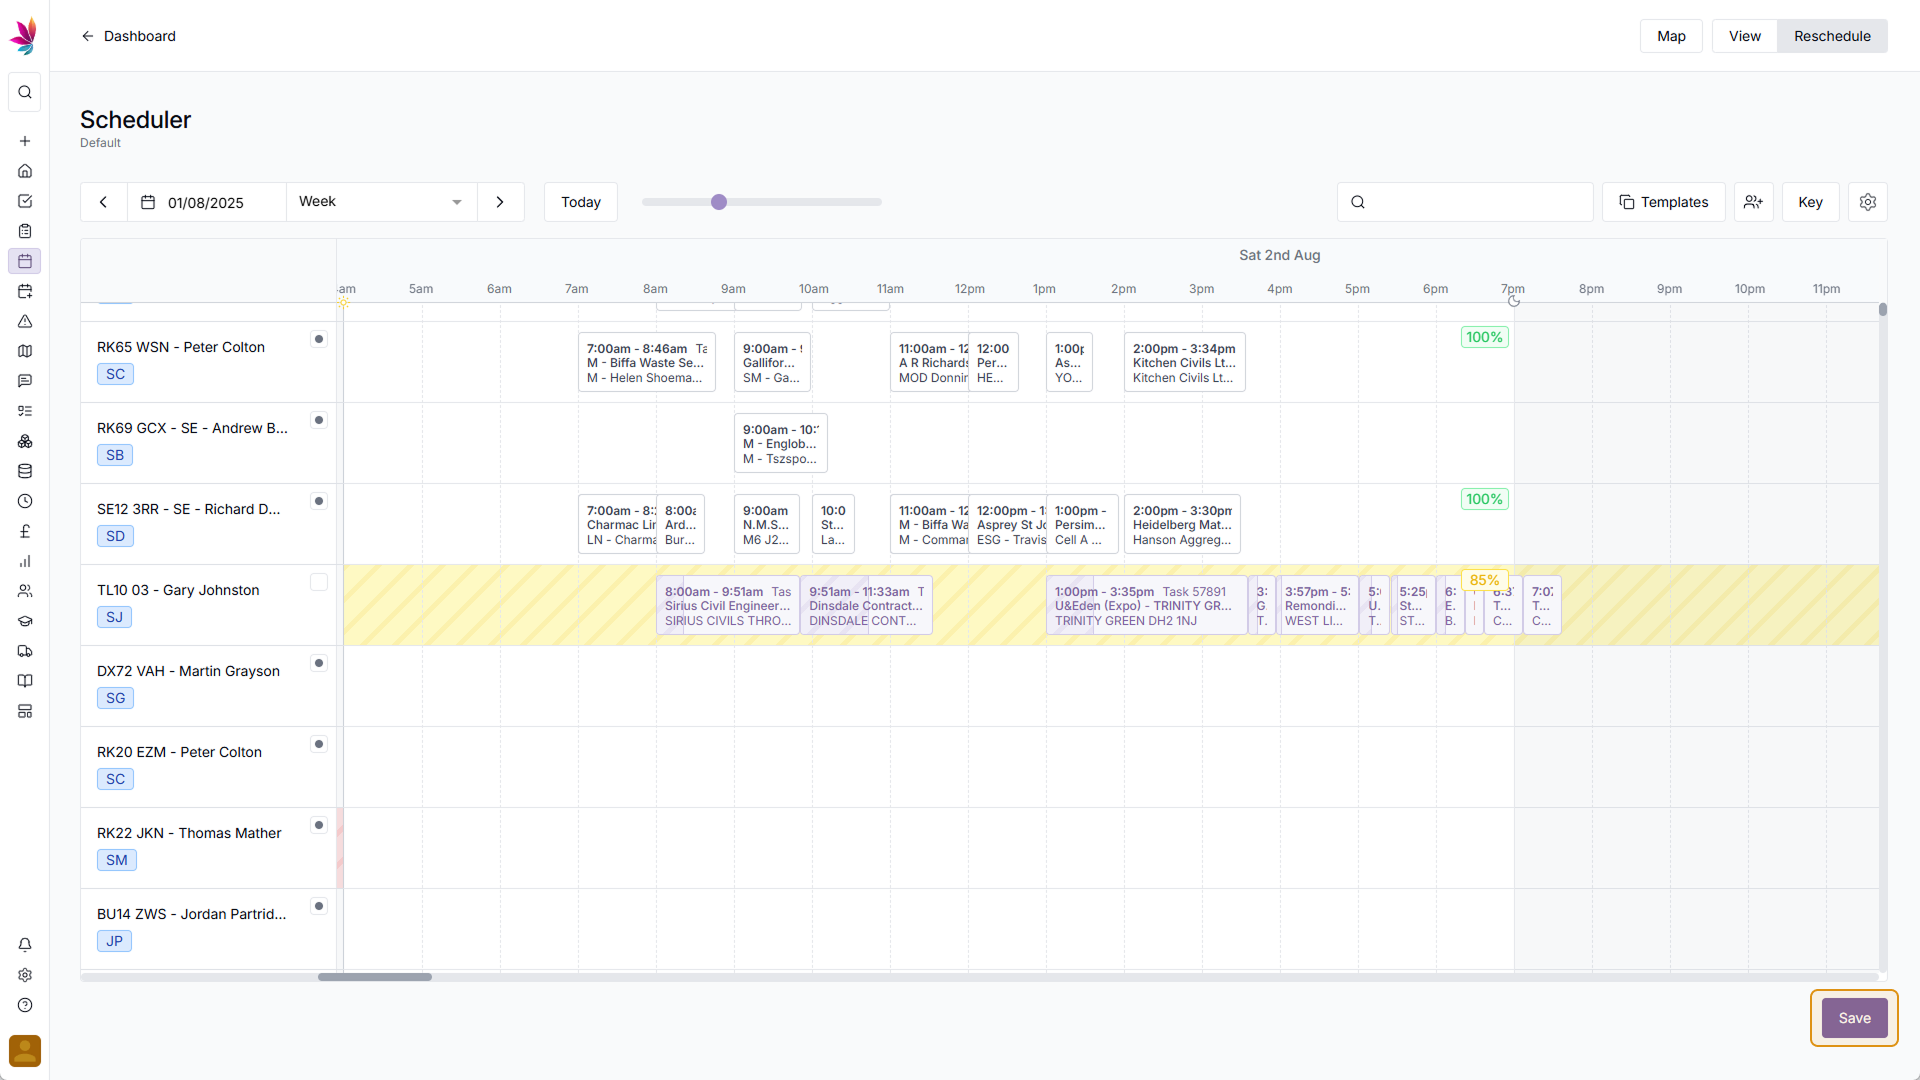
Reschedule Mode
Clicking the 'Reschedule' toggle in the top right corner of the screen will give you extra rescheduling options

Step 7
Teamleaf Ai Optimisation
The quickest and most effective way of rescheduling shifts is to use Teamleaf Ai, which will automatically find the best routes for your schedule. Days will be given a rating based on how efficient their schedule is, and clicking those with a poor score will let you easily optimise those days. Simply check and confirm the changes that Teamleaf Ai suggests, and click the 'Save' button in the bottom right corner of the screen


Step 8
Manual Rescheduling
Shifts can also be manually rescheduled with a simple and intuitive drag-and-drop system. Just click and drag a shift to your desired date and crew, and click save


Step 9
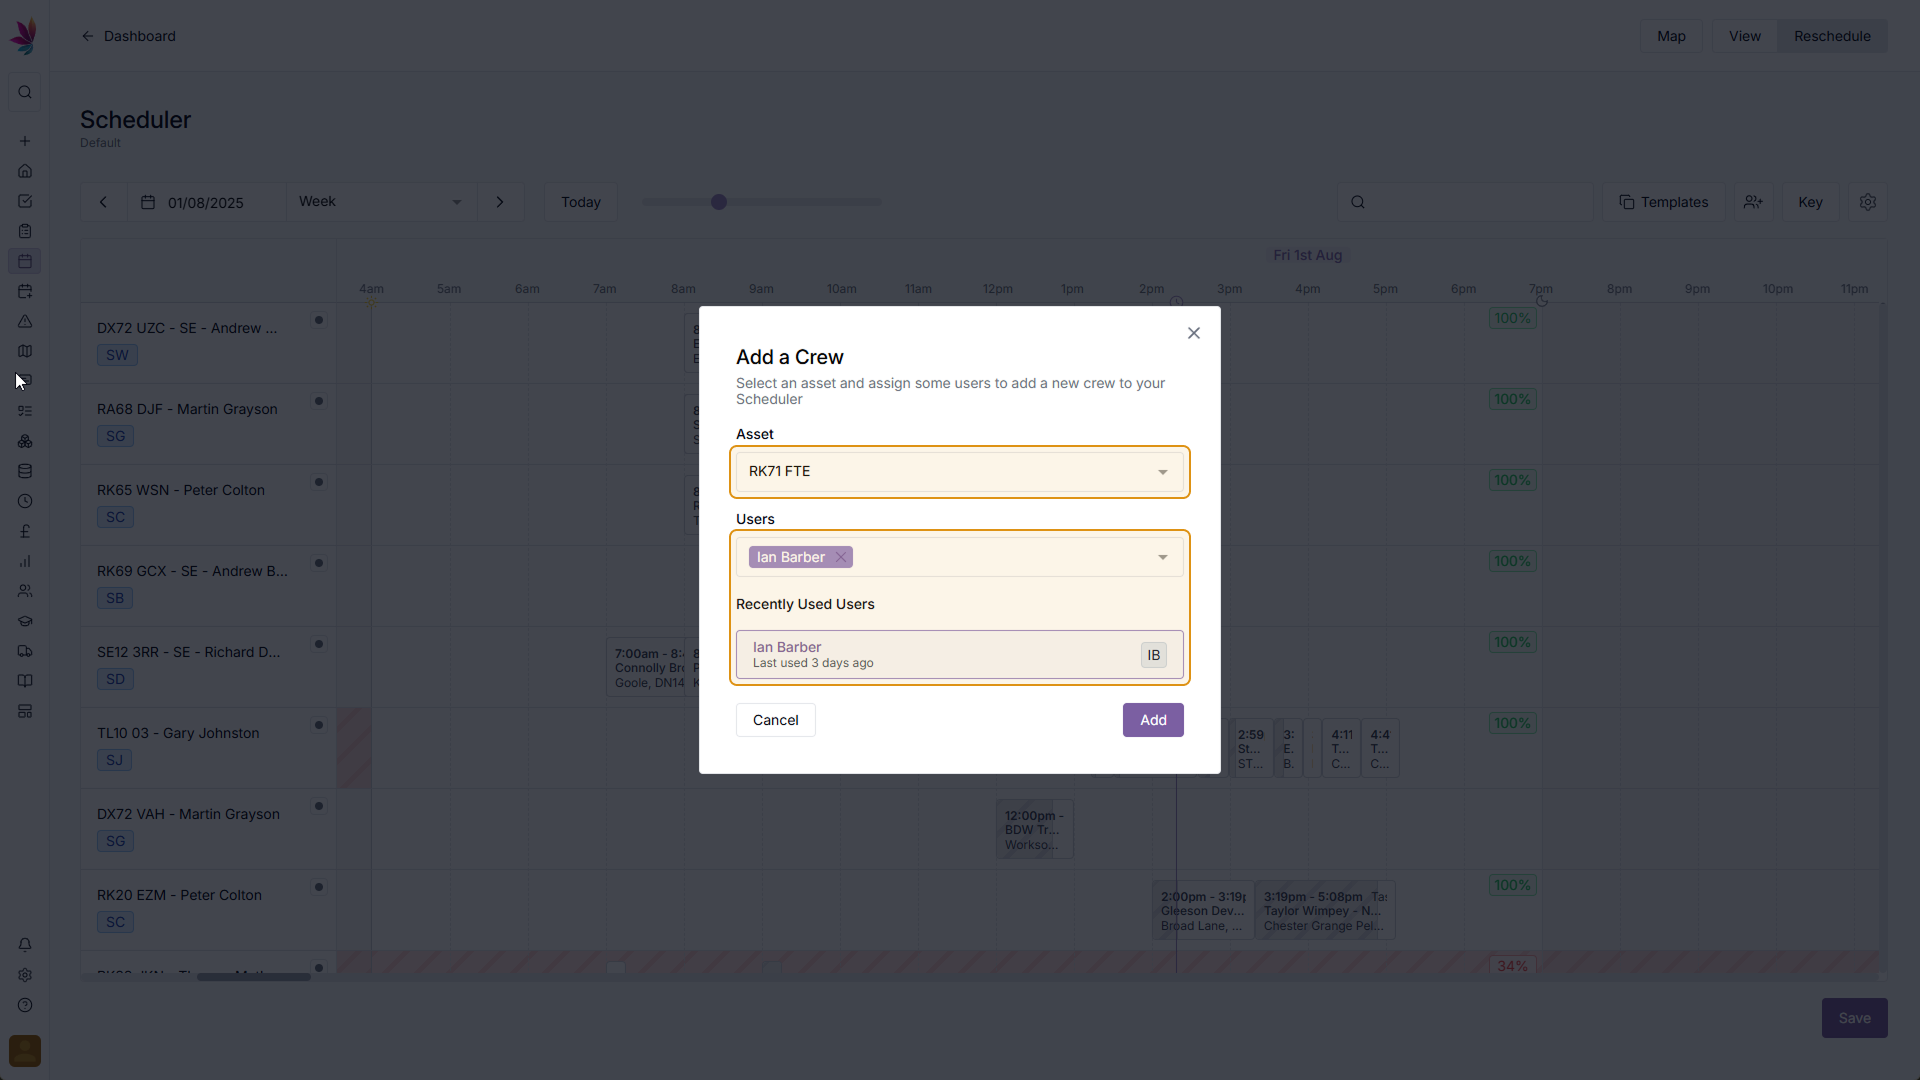
Adding a Crew
If you wish to add a new crew, click the add user icon beside the key button in the top right of the screen. A menu will then pop up allowing you to select users and assets. Selecting either will give you a suggest user/asset to go with it, but you can keep, remove or add to this choice here. Once you're happy with your selected crew, click the 'Add' button, and you will then be taken back to the scheduler, where your new crew will be highlighted briefly


Step 10
Reschedule straight to a new crew
If you wish to reschedule to a new crew, but you haven't made the crew yet, drag the shift to the very bottom of the scheduler, and drop in the 'Add New Crew' section. The same 'Add crew' pop-up from the previous step will appear, and once again you can select your assets and users, then add that shift straight to the schedule


Related Courses
Intracompany
Invoicing
Scheduler
Shifts
Tasks
Drains Direct Essentials
Understand the Essentials for Drains Direct, Scheduling, Intracompany, Invoicing and more...
View Course
→
Intracompany
Invoicing
Scheduler
Shifts
Tasks
EVCSL Essentials
Understand the Essentials for EVCSL, Scheduling, Intracompany, Invoicing and more...
View Course
→
Intracompany
Invoicing
Scheduler
Shifts
Tasks
Lanes Group Essentials
Understand the Essentials for Lanes Group, Scheduling, Intracompany, Invoicing and more...
View Course
→
Scheduler
Mastering the Scheduler
Prove your understanding of the Teamleaf Scheduler, including Ai scheduling, adding new crews, and more
View Course
→
Related Tutorials
Shifts
Creating a new Shift
Learn how to add a new shift to Teamleaf, including how to add all the relevant information that your team need to carry out the work.
View Tutorials
→
Shifts
Creating a Recurring Shift
In this tutorial you will learn how to set up a Recurring Shift Template in Teamleaf
View Tutorials
→
Scheduler
Setup
Customising the Scheduler
In this tutorial you will learn how to customise the scheduler to suit your workflow, allowing you to select your layout and create templates
View Tutorials
→
Shifts
Deleting a Shift
Learn how you can delete a Shift through either the Task List or the Scheduler
View Tutorials
→
Shifts
Editing a Shift
Learn how to edit a shift, through a Task page and through the Scheduler
View Tutorials
→
Scheduler
Setup
Setting up the Scheduler
In this tutorial you will learn how to set up the Scheduler. You will learn how to filter and add the Users and Assets you want to see, and how you can see those crews easily on the scheduler
View Tutorials
→
Scheduler
Understanding the Scheduler
Get to grips with how information is represented on the Teamleaf scheduler, so you can quickly get the info you need in a simple visual format
View Tutorials
→